“Build a better mousetrap, and the world will beat a path to your door”. That’s not actually the original Ralph Waldo Emerson quote, but the intent of the popularised version remains the same. The actual quote is below. Supply creates its own demand was his point, latterly taken to mean innovation will find a market. The mousetrap thing* was only added after his death. I bet he’d wish he came up with that somewhat catchier version.
*According to Wikipedia, the good people of America have taken this quite literally, with mousetraps becoming the most frequently invented item in US history, as per applications to the US Patent Office. Maybe that’s why they also came up with Mickey Mouse and Tom and Jerry, as there weren’t any real mice left to look at…
If a man has good corn or wood, or boards, or pigs, to sell, or can make better chairs or knives, crucibles or church organs, than anybody else, you will find a broad hard-beaten road to his house, though it be in the woods.
Ralph Waldo Emerson
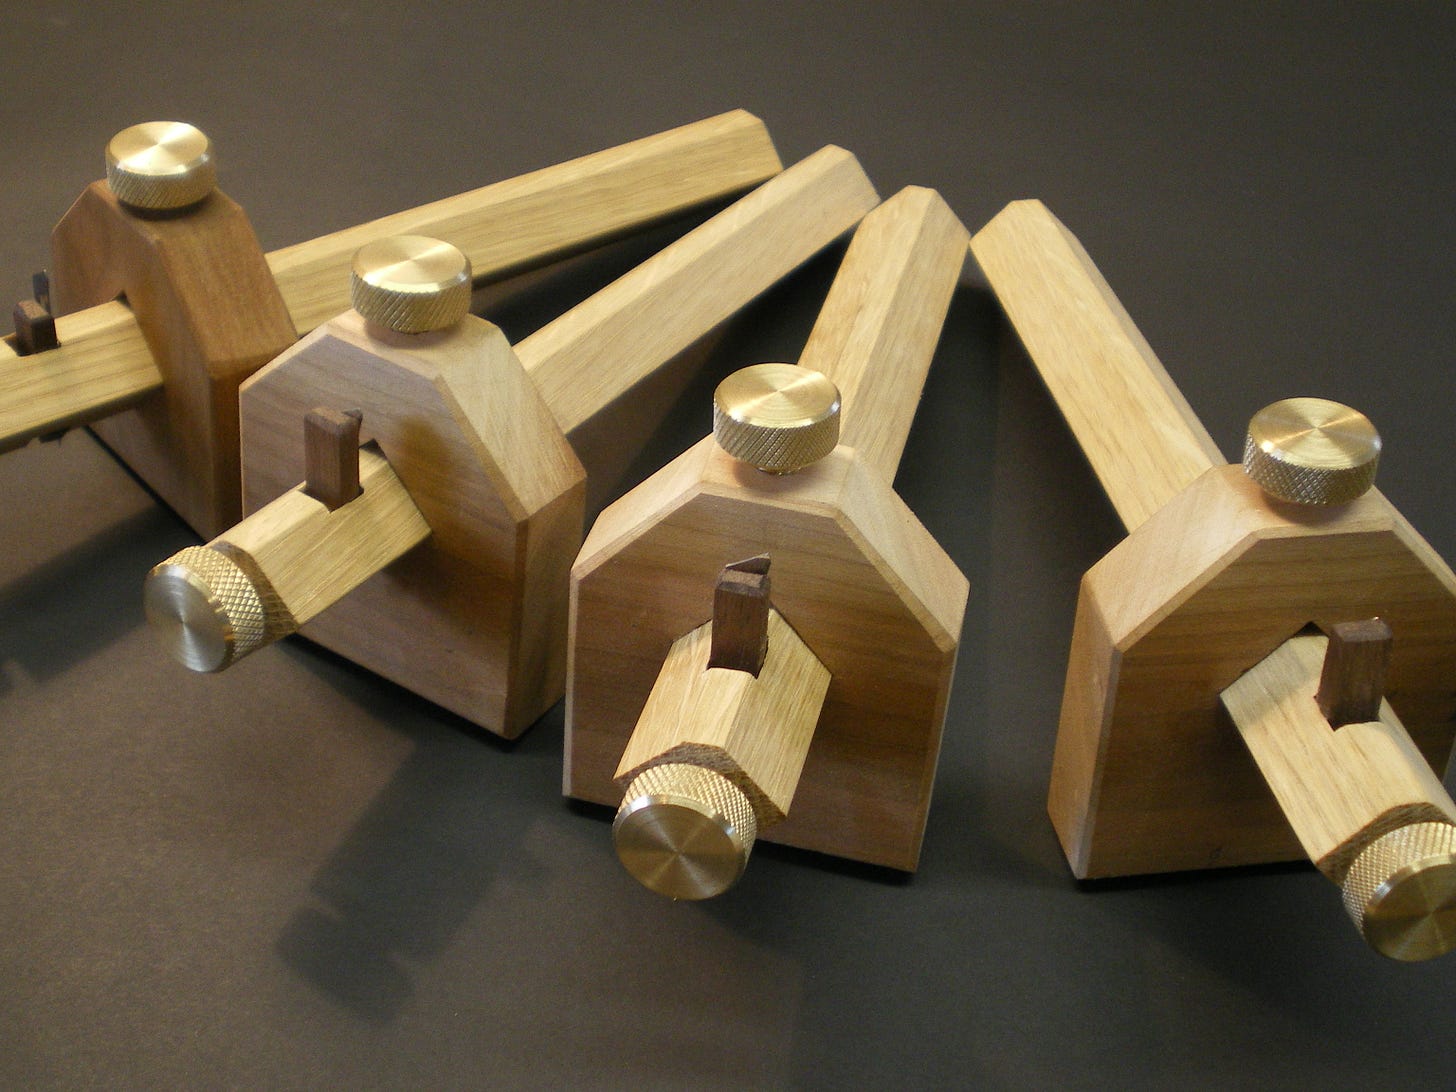
As I know the usage of the quote, it’s generally taken to mean reinventing the wheel. Or put another way, developing “improved” approaches to things that are already perfectly well served by existing solutions. Be that as it may, here is my better mousetrap - The Improved Marking Gauge. I’ve saved you some trouble here. My house be not in the woods and there’s already a perfectly good road right outside. So far there hasn’t been a queue of people waiting to beat me off, or whatever it was he said. If you need a crucible or church organ I am not your guy.
I wrote an article about these gauges in the Christmas 2007 edition of Furniture and Cabinetmaking Magazine (F&C 135). I also wrote a little about them here. I’ll try not to repeat myself too much, but frankly there’s quite a high likelihood of that. Thinking about it, F&C probably own the copyright of what I wrote there. Anyway, the design idea is still mine. Come at me bitches and see what happens.
What prompted me to develop and make my own gauges was reading David Charlesworth’s piece “Grasping the Fettle” in his 1999 book Furniture-Making Techniques. This was an anthology of articles that had previously been published in F&C. He proposes a 5-step process to regrind the pin, re-drilling the stem so the pin can be repositioned, and planing the stock to true it up. That all sounded like a lot of effort to me and was verging on creating Theseus’s Marking Gauge. So I decided to start from scratch and make a set of gauges that did what I wanted from the get-go, rather than polishing the turds of mass-produced gauges to get to an end result.
As you know, I like a list. So I’ll cover the main points of difference these gauges have. I’m sure you can figure out yourself how to make one, there are after all only two main components. Plus a few other bits and pieces.
The cutting edge is a Swann-Morton scalpel blade. I like a 10a myself, but an 11 would also do. I think we all know that the 12d isn’t suitable. That’s crazy talk. My take on this is why waste your life fucking about re-grinding a pin, when there is a box of surgically sharp blades right there on the shelf? A slightly dull blade is actually beneficial for making a clear mark. When it’s too blunt, throw it away and put a new one in.
The hole that the blade is clamped in is also sized to take a pencil. You can simply loosen the locking screw and switch one for the other. I also use a clutch pencil in mine. You need a little wooden support block to back up the blade when it’s in there. You only want a small amount of blade projecting, as it can be somewhat flexible if too much sticks out.
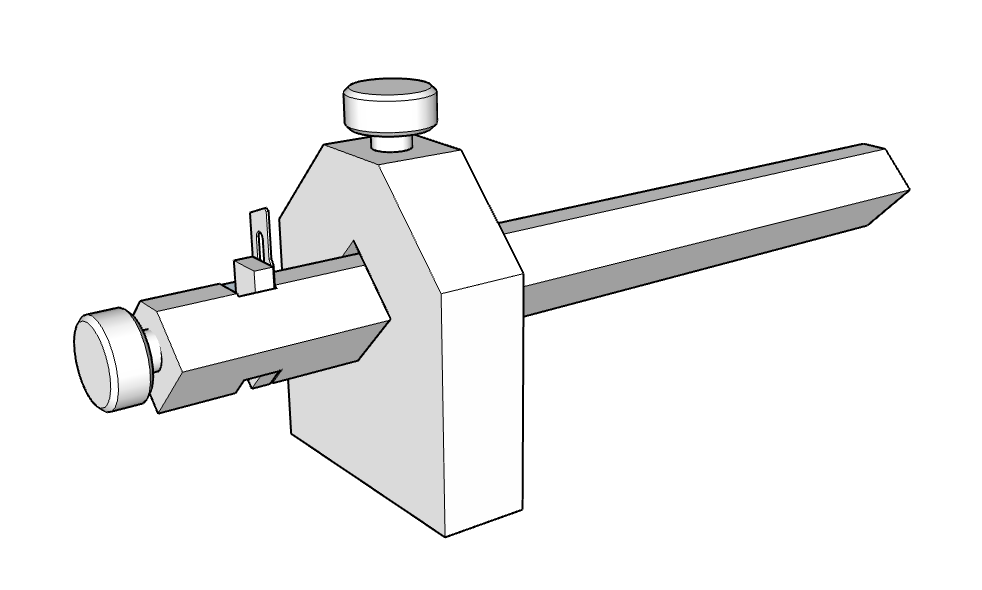
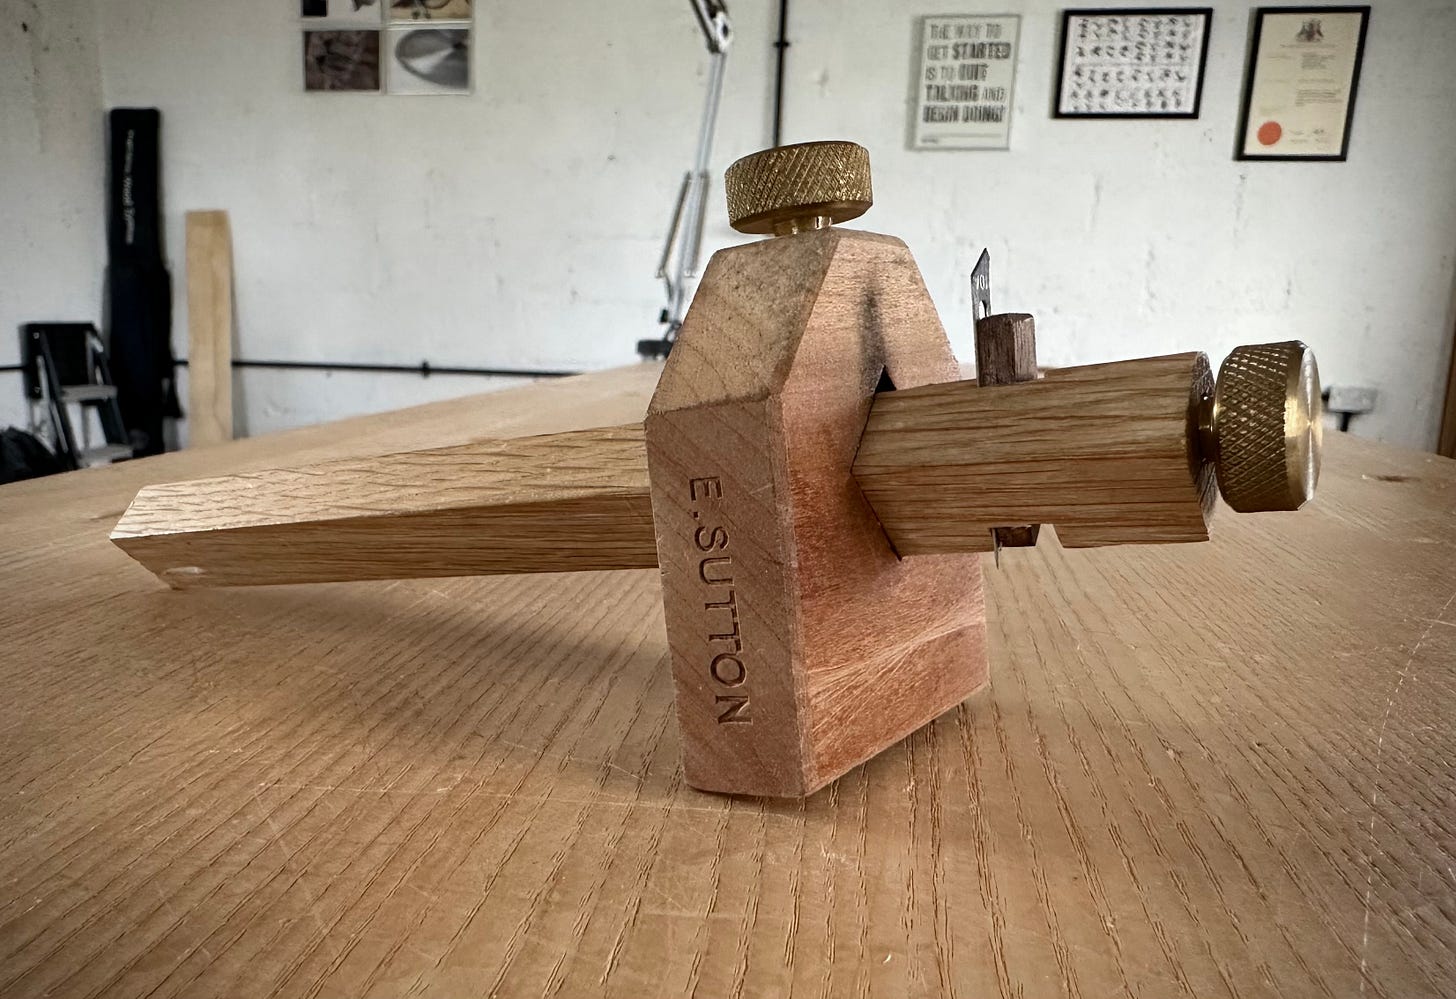
The square stem is orientated at 45 degrees, so the clamping action is across the diagonal. This means that you can have a little slop in the fit of the stem in the mortice for ease of movement (I allow 0.5mm) and when you tighten the locking screw the stem is held fast into the corner. It never wobbles. This is not a new idea and I think was done on both Stanley and Marples gauges at one time. Some newer makers seem to have forgotten this trick. This orientation of the stem also means that when you peer over the top to see the tip of the blade, the profile of the stem doesn’t block your view.
This design exploits the technique of thread cutting directly into wood. When I first did it I was unsure how long it would last, but we’re 15 years in and still going strong. I used standard metal cutting taps to form the threads. By experimentation I reckon you need about 20mm of thread in wood for it to be durable. Less than that and over time the stress can pull the threads away. Originally these gauges just had M8 A2 stainless bolts in them, which I later swapped for brass thumbscrews I turned myself. The bolts worked perfectly well, but I’m fancy.
They don’t roll off the bench. And being wood they’re lightweight to handle and warm to the touch. All small things I accept, but things that change the experience all the same.
When I’m setting the gauge, I get the stock in more or less the right place and partially tighten it. Then I tap one or other end of the stem on the bench to move the stock to its final position before locking down the screw. It becomes a quick and intuitive method of work. It’s also one handed so you can hold a rule in the other hand.
I’ve modelled the Improved Marking Gauge in Sketchup, which you can download for free from the 3D Warehouse here. You can take all the dimensions you need directly from the model (provided you can work in metric that is). Forgive me for not modelling the screw threads. That was a bridge too far for my tiny mind. I did once model a corkscrew in Release 13 AutoCAD, but that was back in the glory days of early 3D modelling circa 1996. Whilst software might have advanced since then, sadly my CAD skills have gone the other way.
If you’re in need of marking gauges, give this design a go. There’s some serious satisfaction to be had from making your own tools, as well as the obvious financial benefits. After more than 15 years my gauges are looking a little battered, but I don’t see any reason why they won’t do another 15. Hopefully I’ll be there with them.


this article is informative and absolutely hilarious. i almost got coffee up my nose at one point. thanks for the read!
Thanks for sharing, Best marking guage design I've seen so far. Love the use of a scalpel blade. Definitely putting this one on the project list.