


What Do You Bench Bro?
Thankfully, not a post about gym workouts

Before we start, I should say the six-stick comb-back chair is glued up and essentially finished. All is well. I’ll paint it next weekend and post a look back at what we’ve learned along the way after that. Quite a lot I think. But to avoid bollocking on about chairs too much I thought we’d take a look at the very centre of the workshop today, both figuratively and literally speaking. My bench.
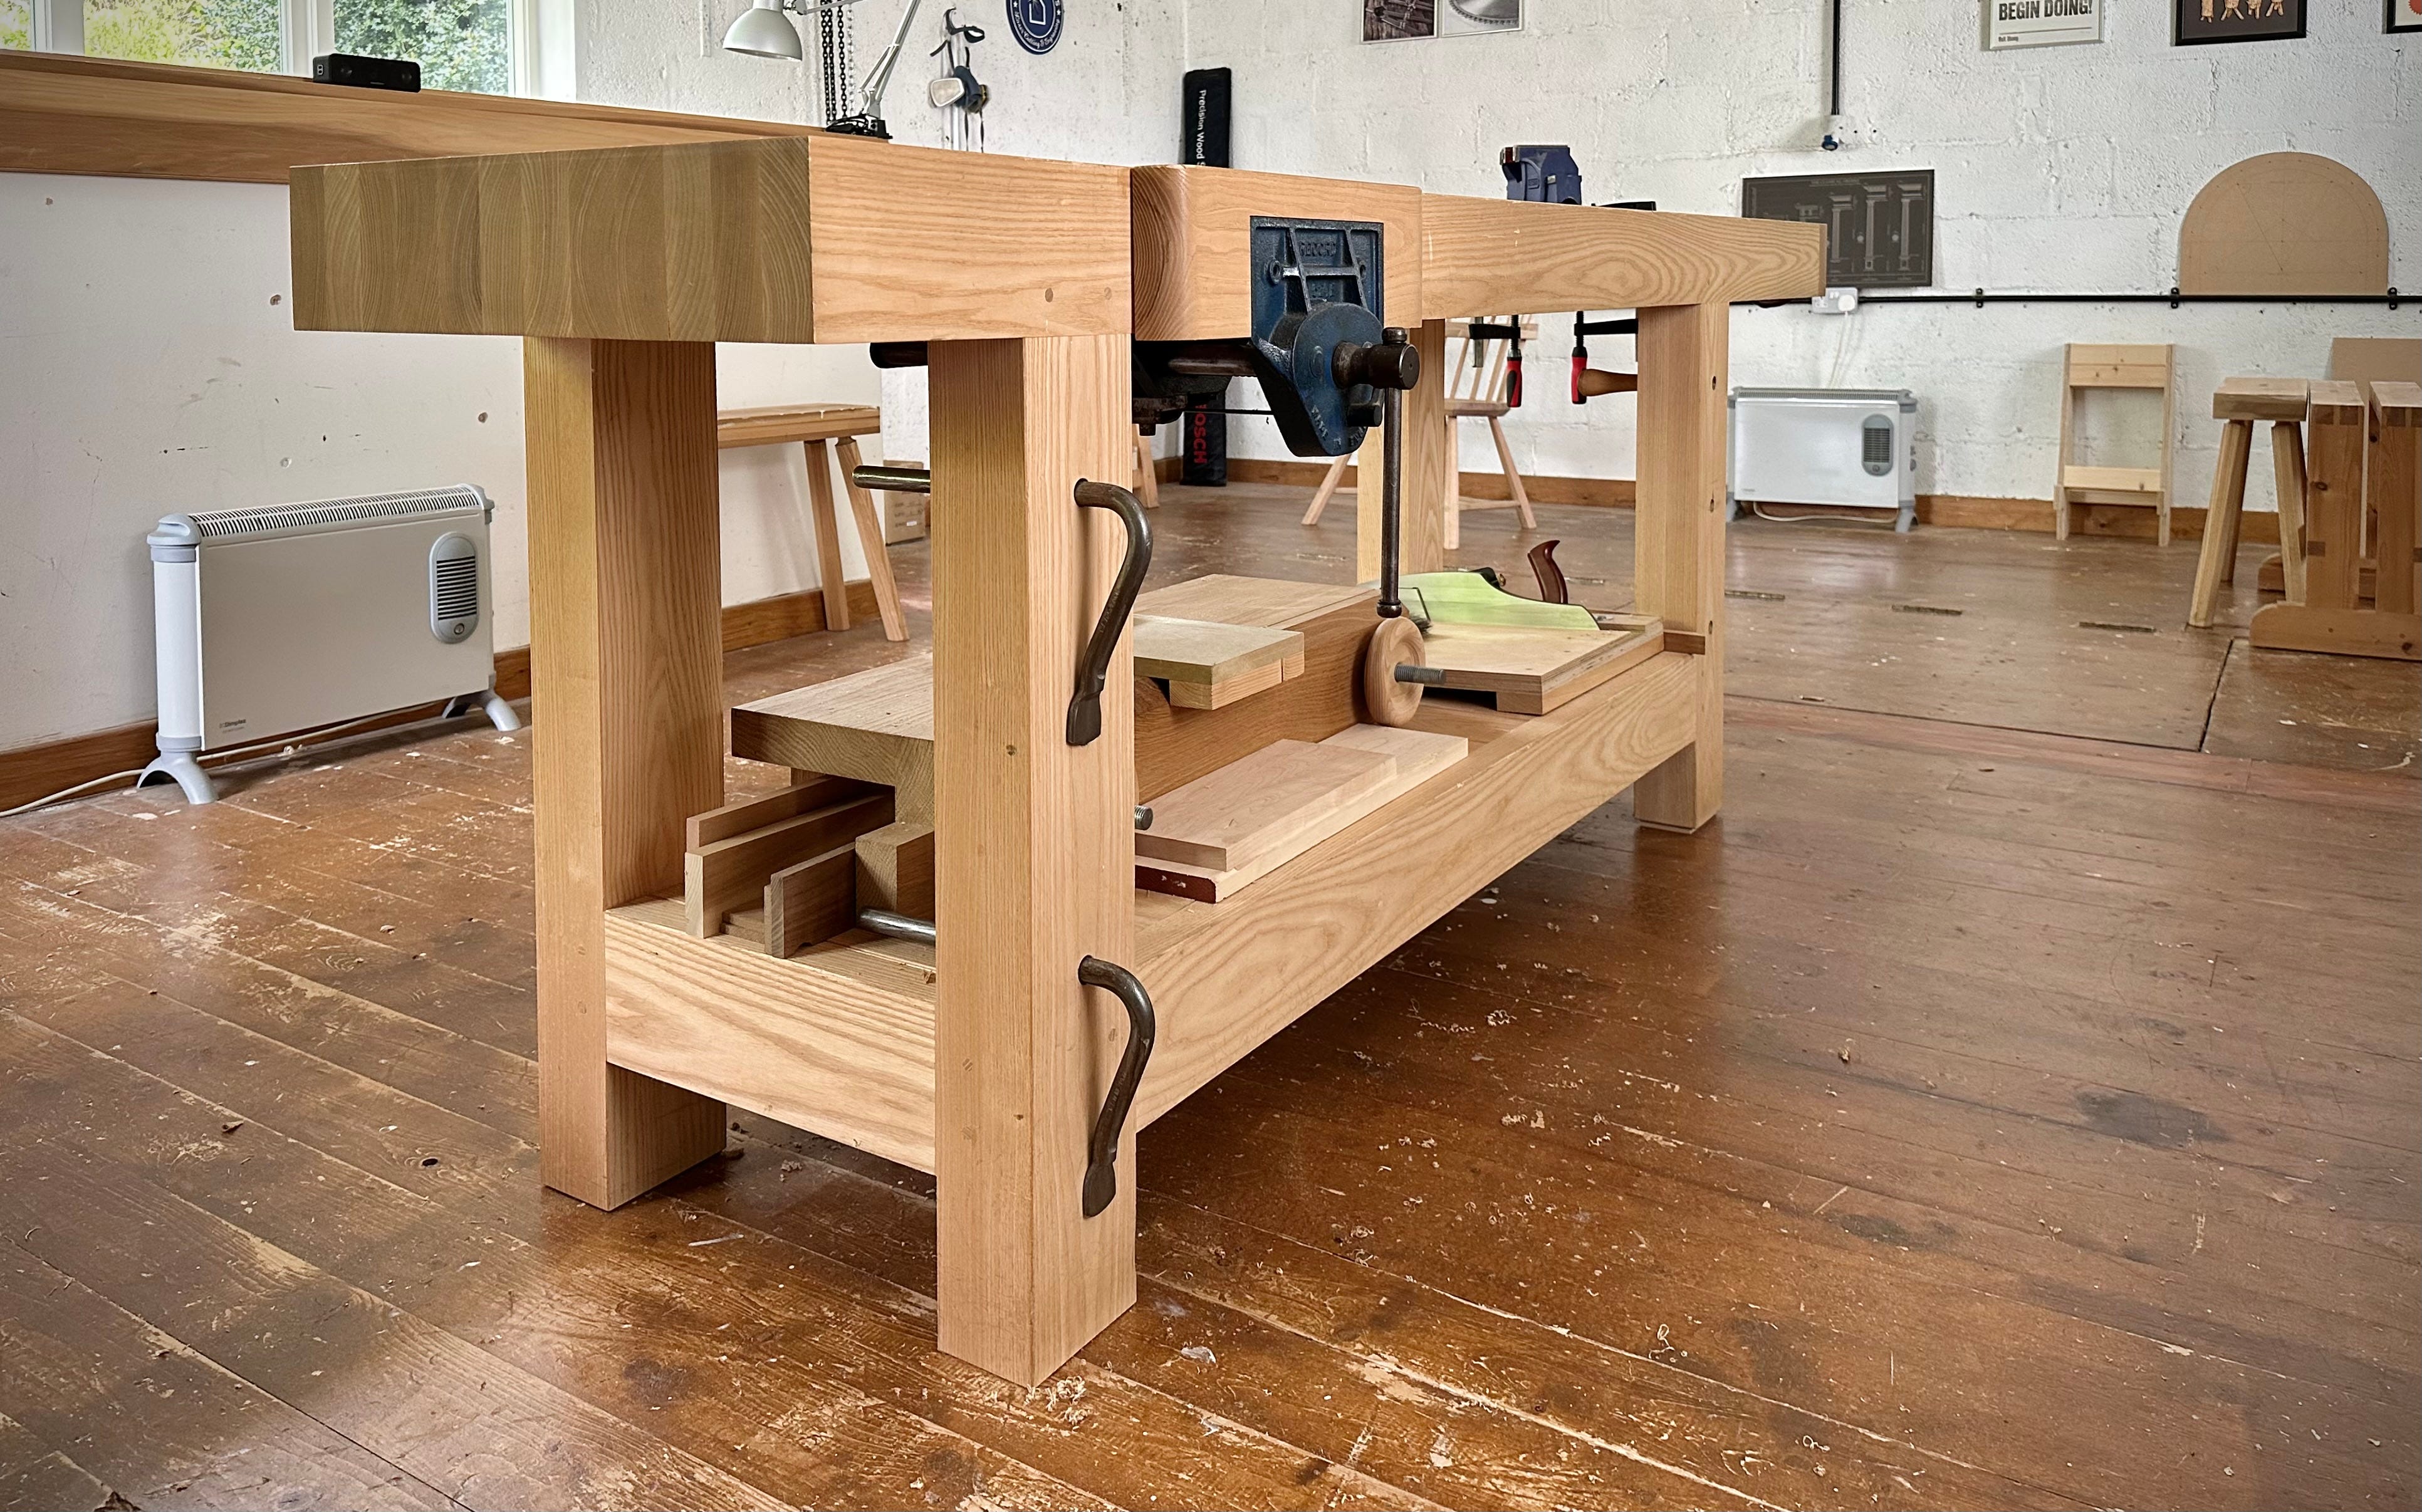
Made in 2015, this bench is pretty much the French Workbench that Chris Schwarz wrote about in his 2007 book Workbenches: from Design & Theory to Construction and Use, published by F+W Publications. It’s what people have since taken to calling a Roubo bench. Seems somehow fitting given my French roots that we learned of in previous posts, not that I knew that when I made it.
I made a number of changes to the French Workbench design to suit what I wanted from a bench. I don’t have a leg vice, or a crotchet, or a sliding deadman, or a planing stop as Chris did. I do however have a metal face vice and a tail vice that the original design didn’t have. I think Chris later added a wagon vice to his bench, which isn’t on the original in the text, but is there by the time the cover photo was taken.
I know woodworkers like facts and figures, so here’s the skinny on this bench:
Material: American Ash
Length: 2,400mm or 94 3/8” (just shy of 8 foot basically)
Width: 545mm or 21 3/8”
Height: 875mm or 34 3/8” (this is tailored to suit the individual - I am a shortarse)
Top thickness: 125mm or 4 7/8”
Legs: 90mm X 130mm, or 3 1/2” X 5”
Weight: A lot I guess, I don’t really know as I’ve never weighed it.
Face Vice: Record 52 1/2E (as I have it set up, this gives me a maximum 9” opening)
Tail Vice: Benchcrafted (this was the only model they did at the time)
Holdfasts: 2 nr. 3/4” Gramercy from Tools for Working Wood.
Bench Dogs: 6 nr. 3/4” Veritas Brass Bench Dogs
Finish: Nothing, naked as the day it was made
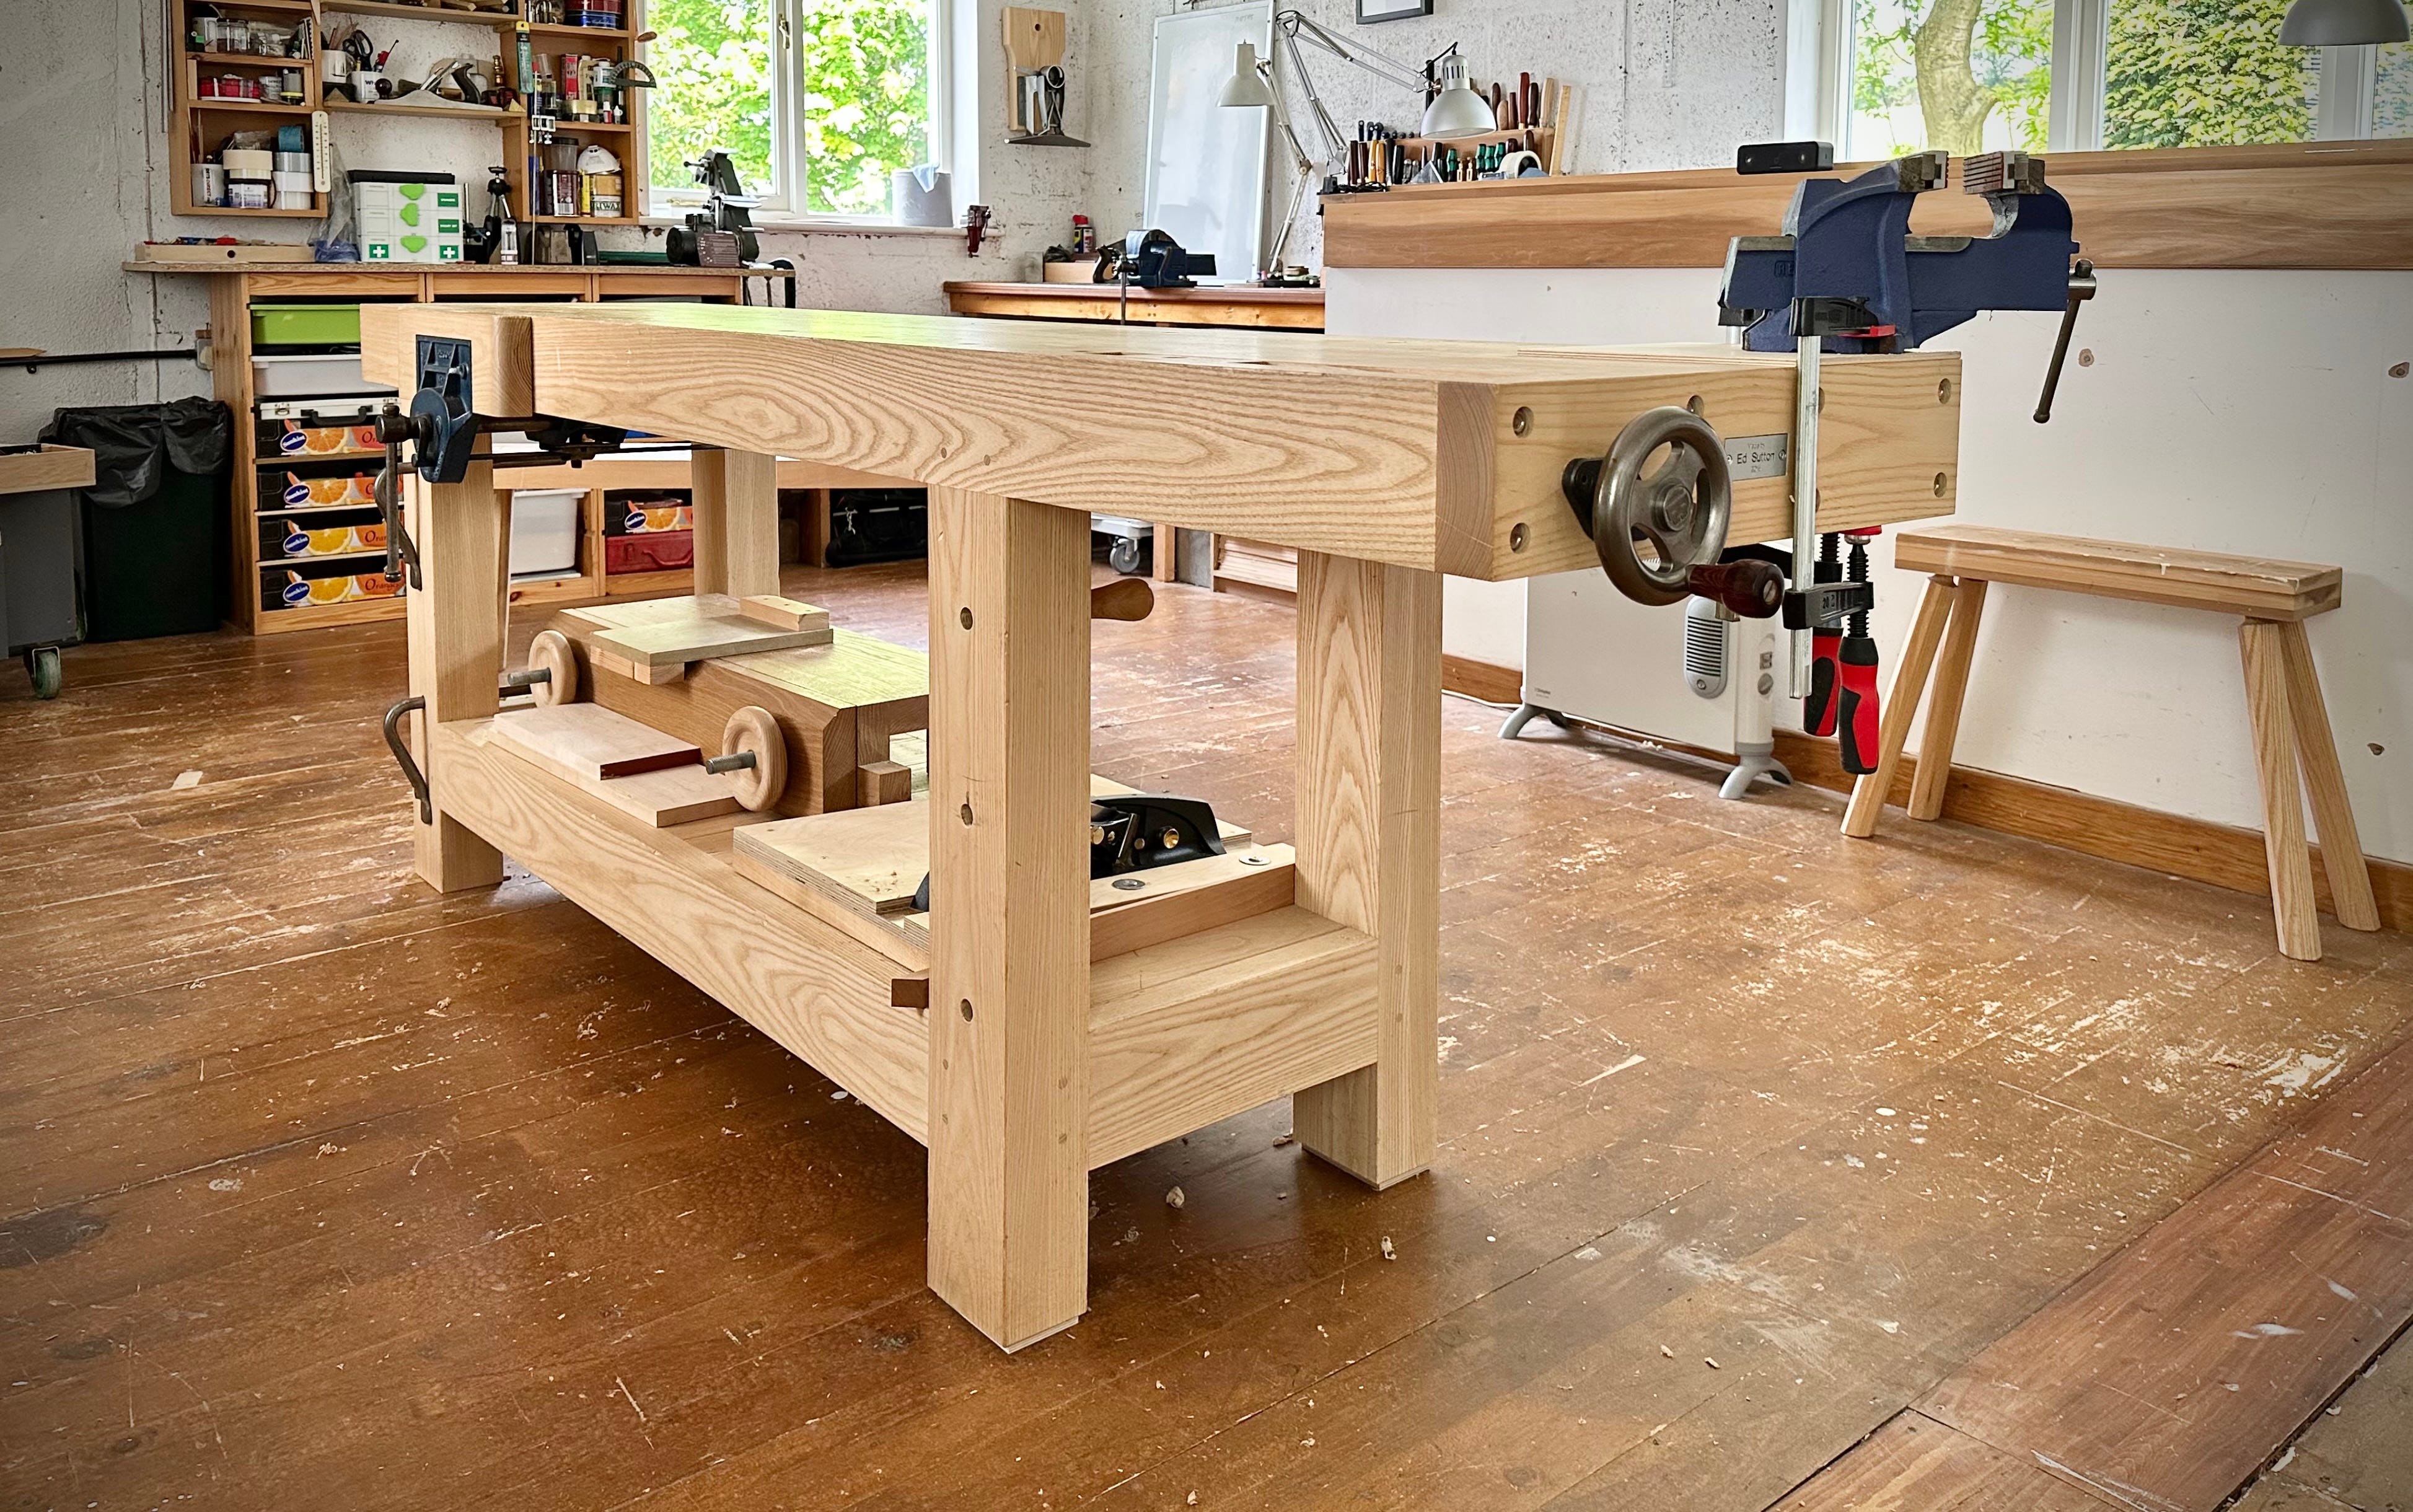
The stretchers use mortice and tenon joinery into the legs, and the legs have tenons that locate in blind mortices in the top. All the joints are draw-bored with Ash pegs. I didn’t glue the top to the legs, as I thought I might one day want to drill the pegs out so I could remove it. I doubt I ever will. I know there was a fashion for legs with gigantic dovetail tenons exposed on the surface of the bench for a while, but I like this approach as the benchtop is a clean surface and any shrinkage doesn’t affect the working surface of the bench. The top is laminated from 12 pieces of Ash, all of which were orientated so the planing direction matched, thinking of ease of flattening.
I agonised over the thickness of the top quite a bit. Originally I planned for 4 inches, but the material I ordered came in wider and it seemed crazy to create waste unnecessarily, so I ended up with a shade under 5”. The one problem this causes is with the length of the Veritas Bench Dogs, so I made a huge countersink to the underside of each hole using a chamfer bit in the router.
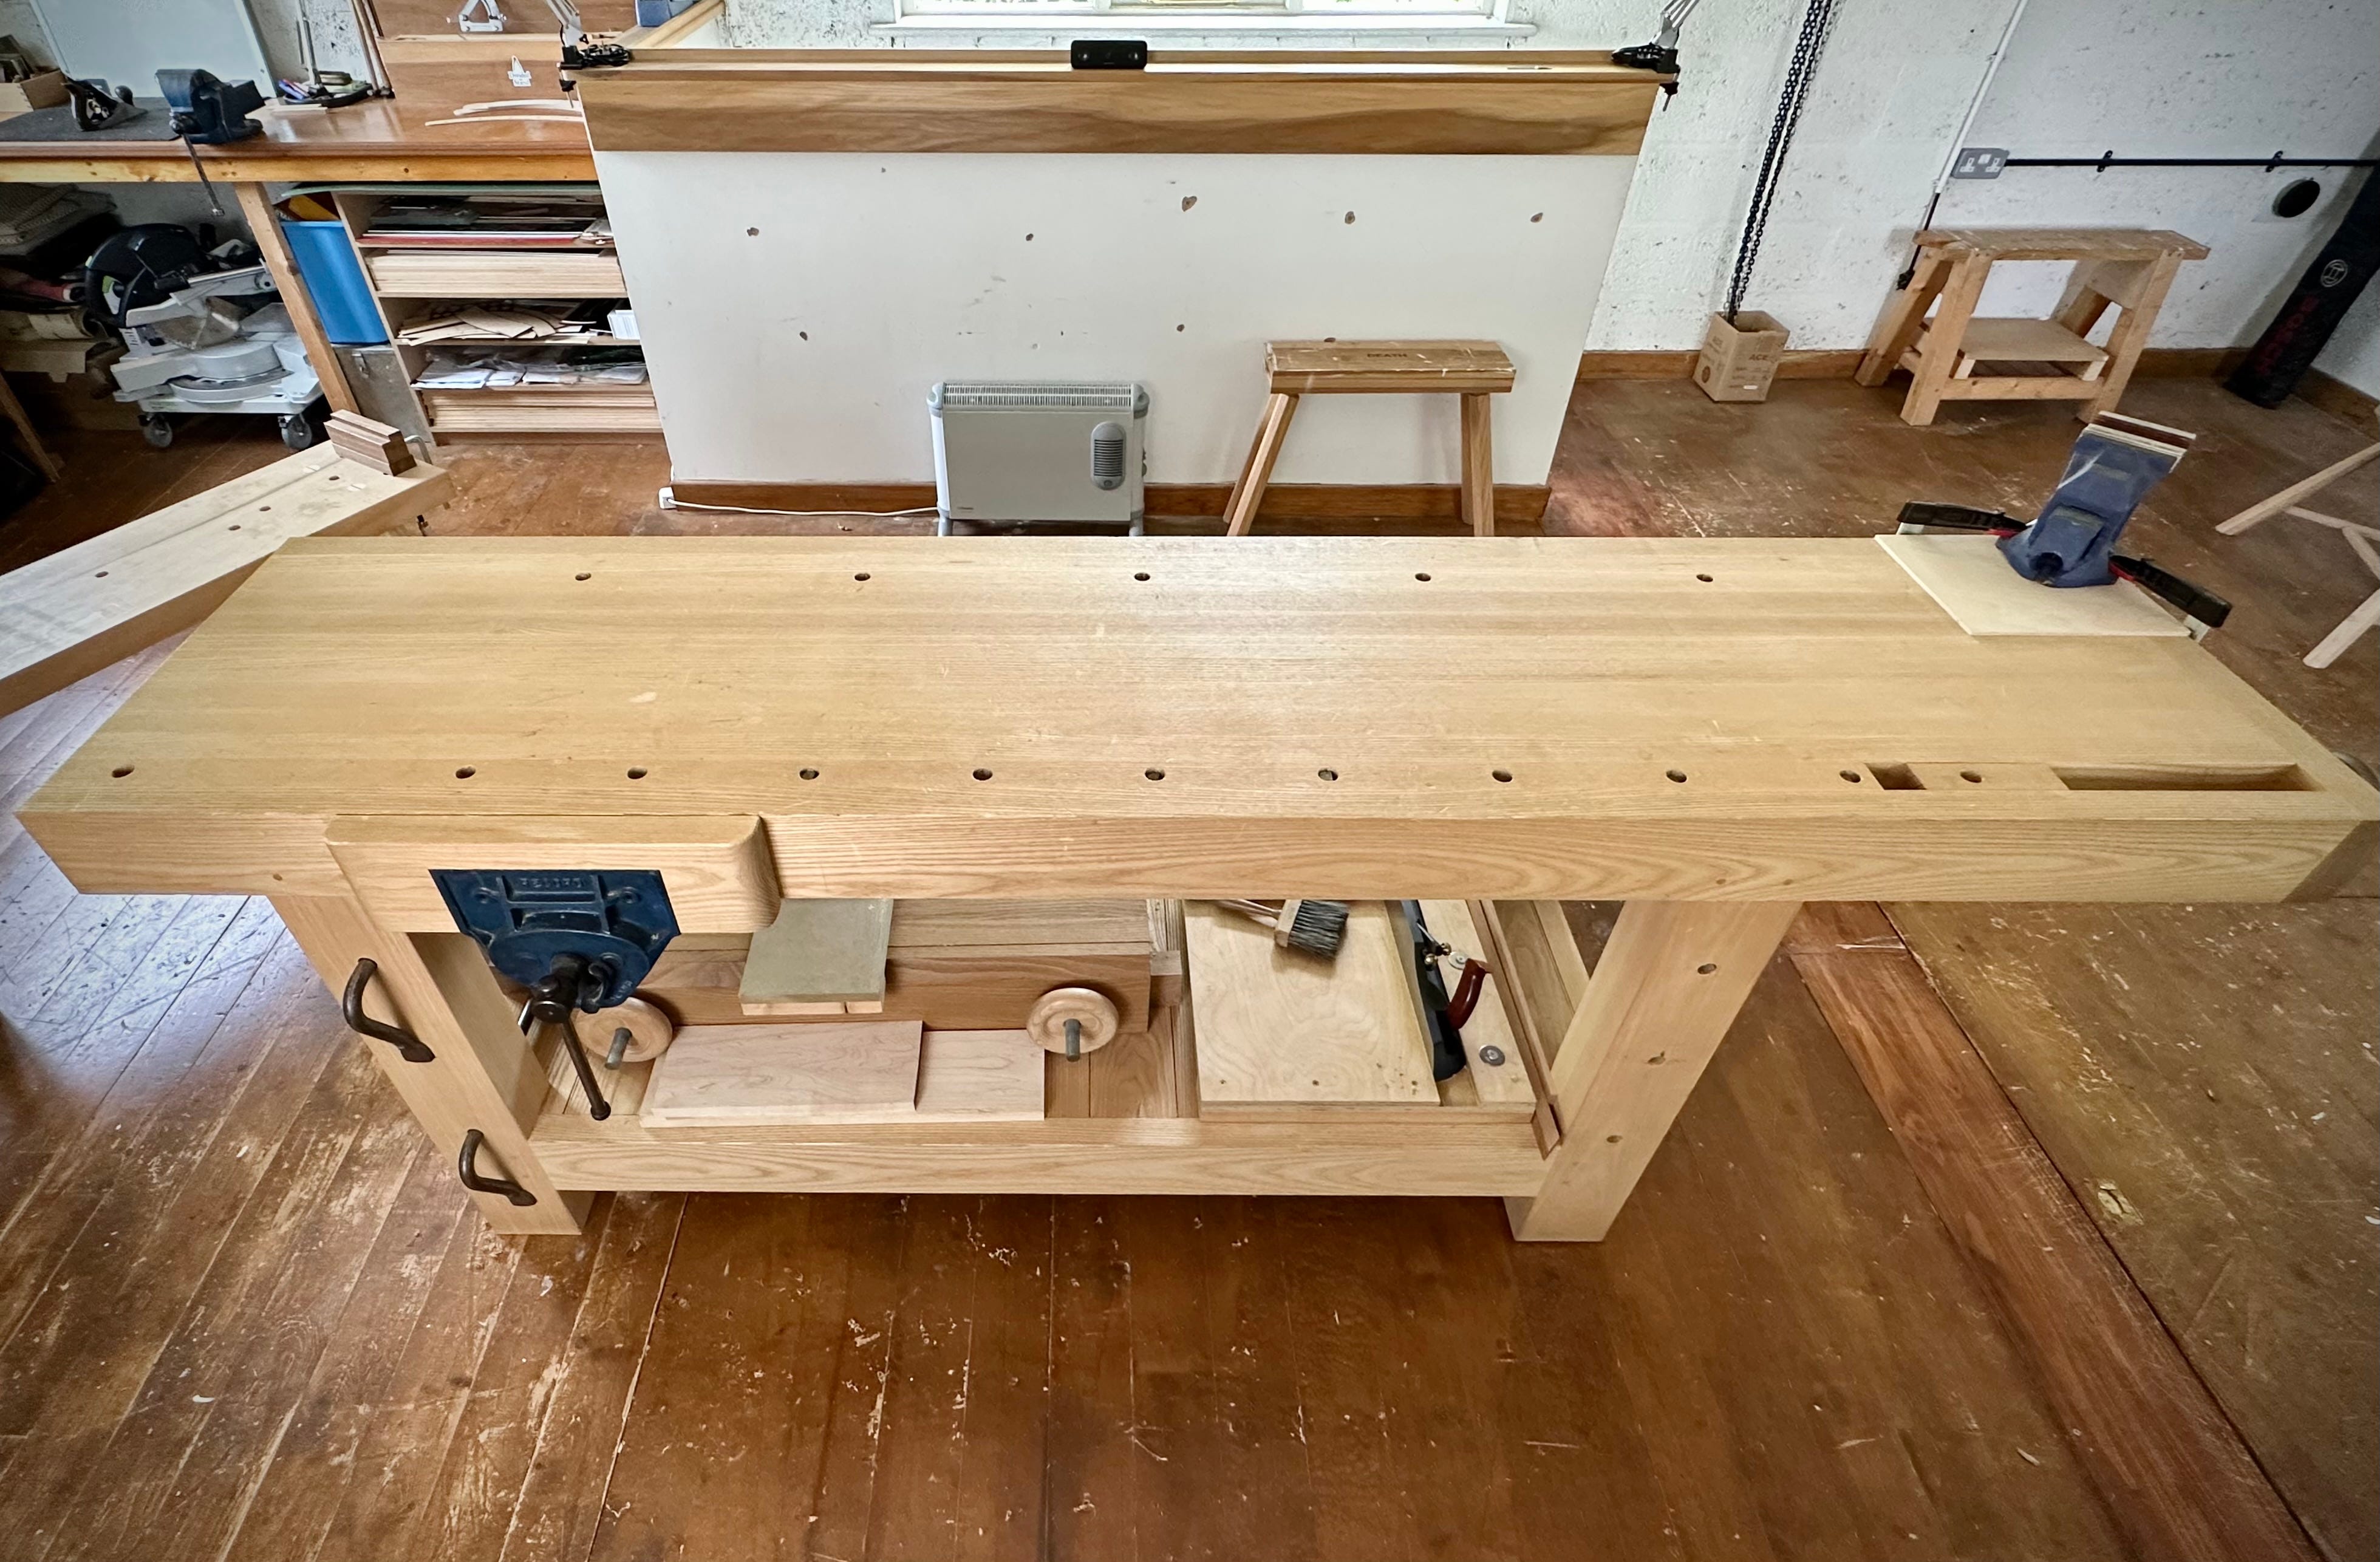
Doghole spacing is another detail I spent a surprising amount of time thinking about. When you’ve put a lot of hours into making a bench you really don’t want to drill the holes somewhere you regret. The pattern I finally settled on seems to justify my prevarication, as I have yet to regret any of the choices. The front row, mainly intended for dogs, are set at 7” centres and there are 10 of them. The back row, mainly intended for holdfasts, are set at 14” centres and there are 5 of them. I also put holes in the front legs, but to be honest I mainly use these for holdfast storage. Occasionally I will put a peg in the right leg to support the end of a large board held in the face vice. I have 6 dogs and I leave these in my most used holes (let’s keep it clean people) so I can just pop them up when needed.

I’ll warn you now I am going to be saying “vice” not “vise”. It’s the same thing, just spelled correctly. I wanted to stick with what I see as the English tradition and use a cast iron face vice. My pal Doug found this one for me and it is perfect. I love the quick release function on this vice. To avoid the dogholes I’ve had to install it quite far back on the underside, but even so I still get 9” when fully open. I intended to install leather on the cheeks, but it hasn’t ever seemed necessary.
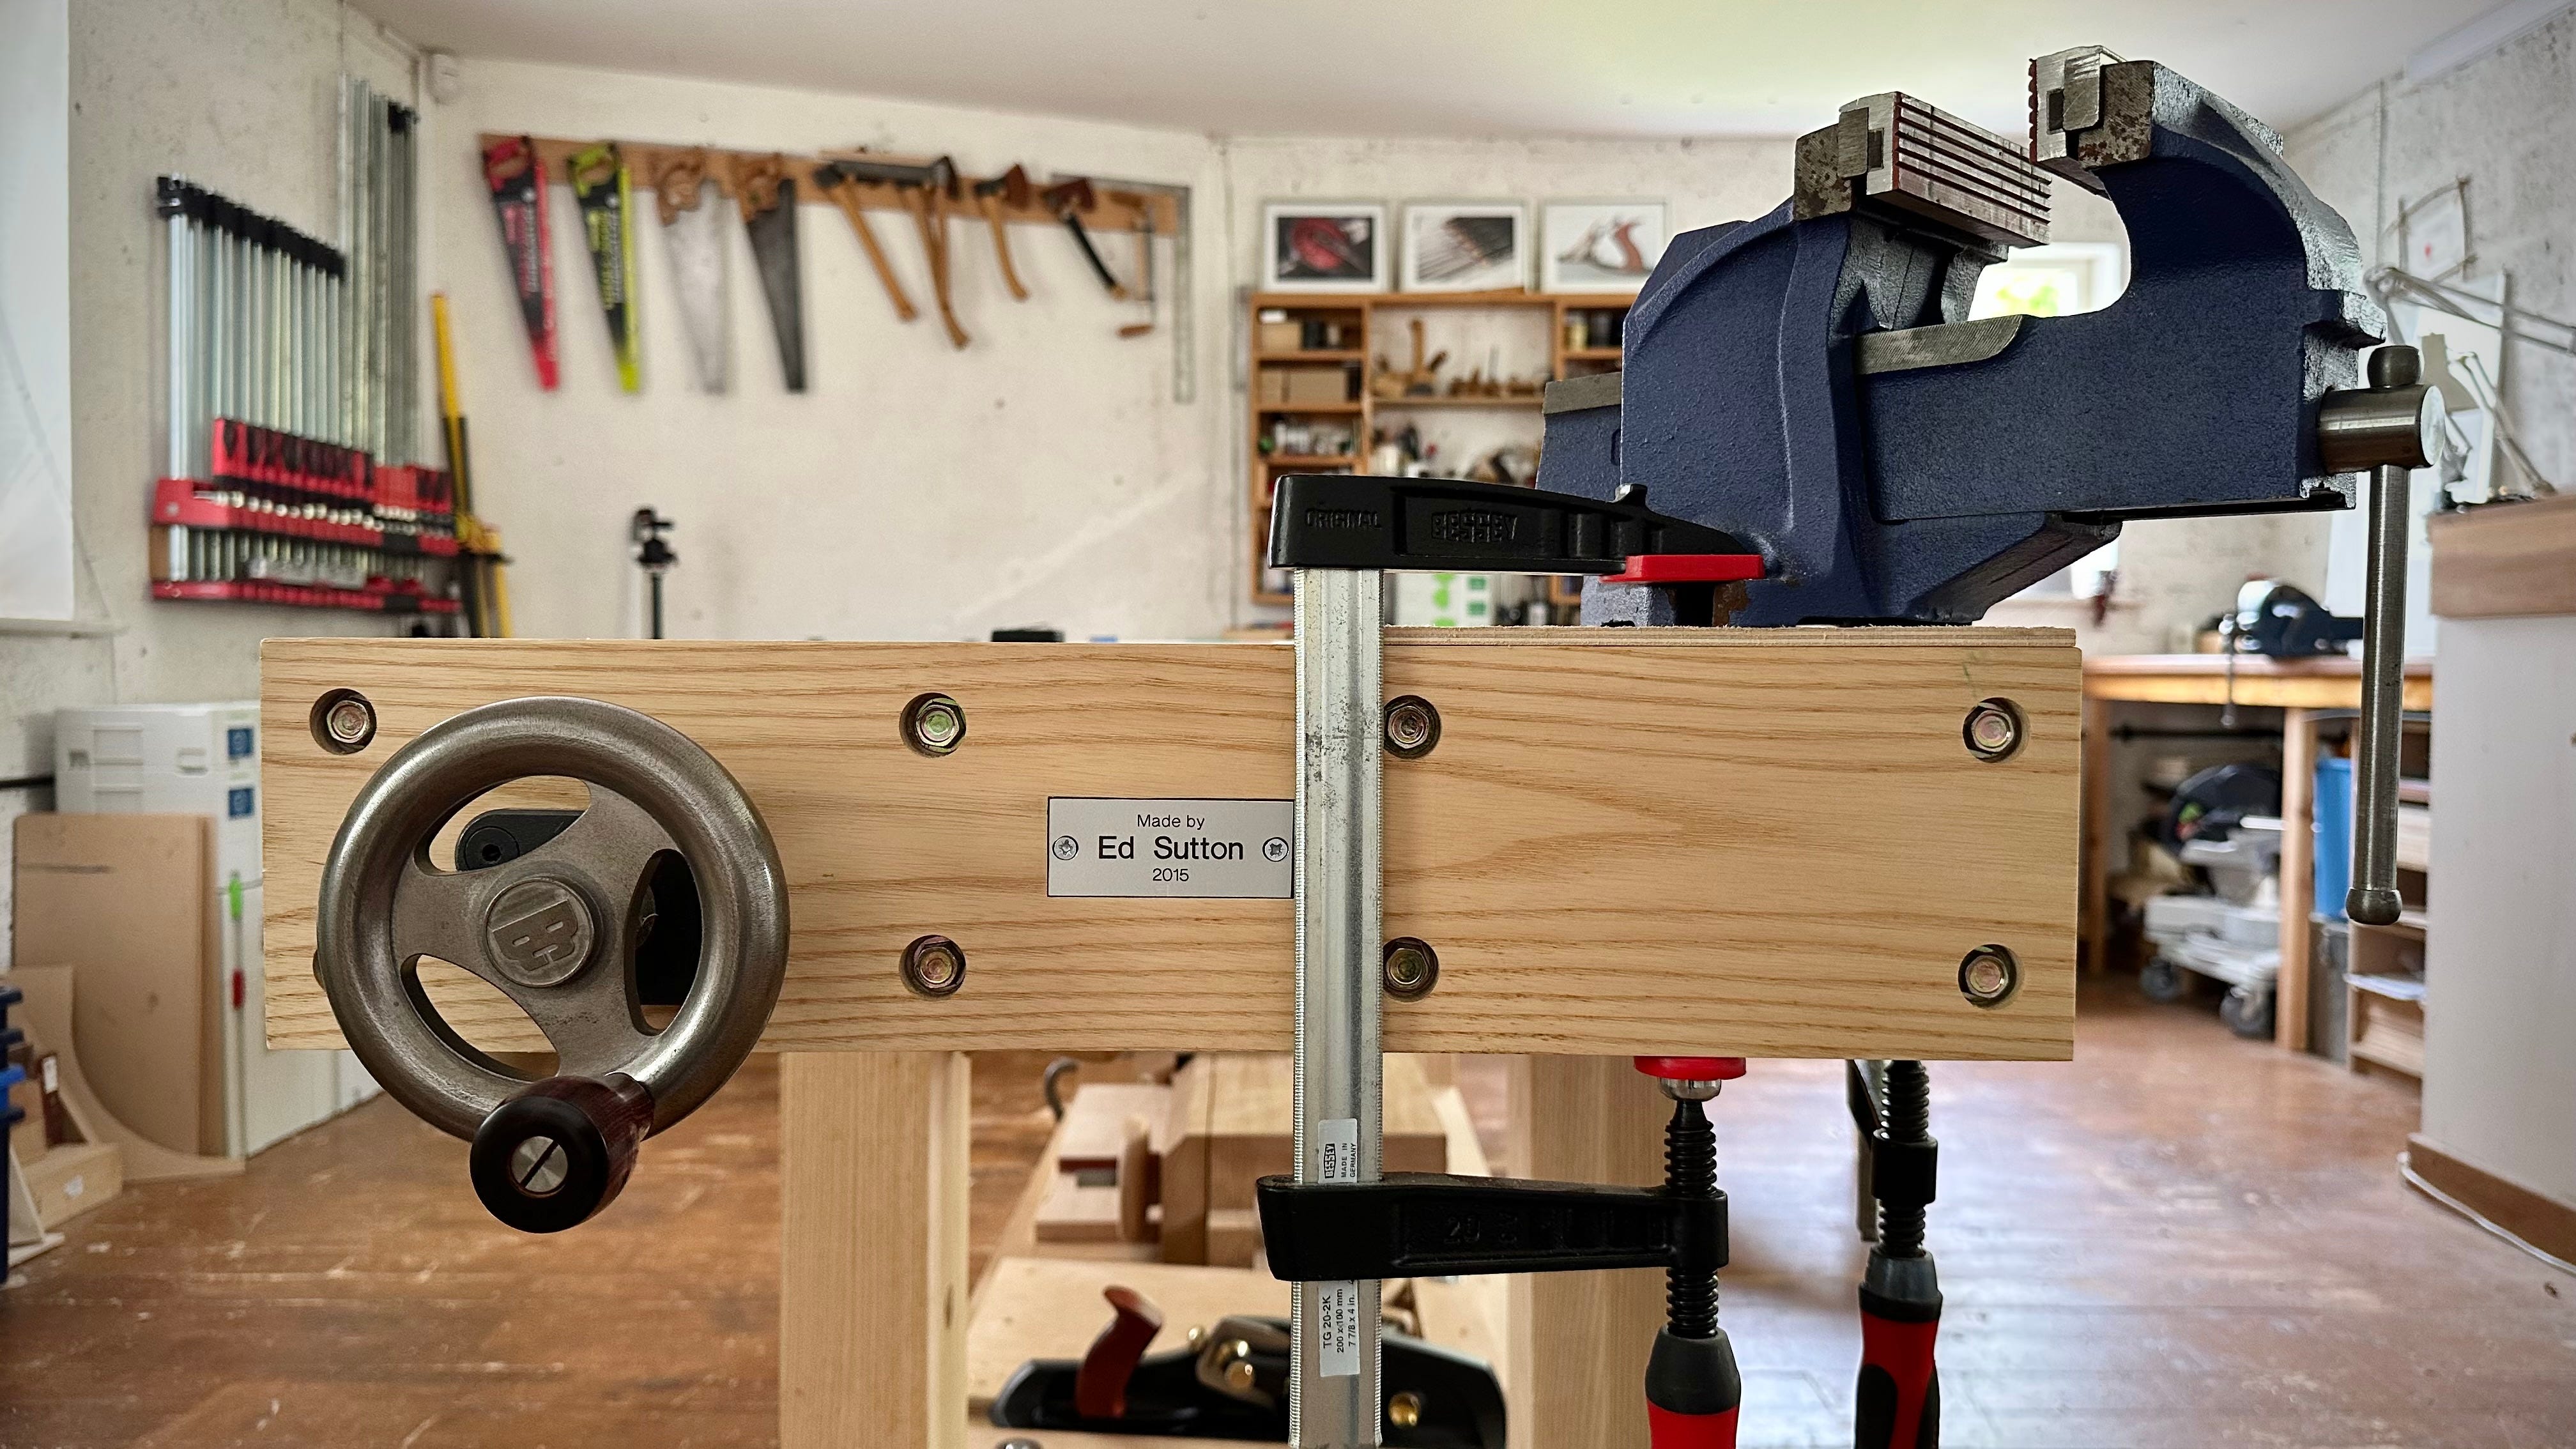
The Benchcrafted wagon vice is a great piece of kit. It outperforms most other traditional tail vices, as there is no possibility of sag over time. The sliding block that carries the moving dog is captive in the benchtop, making it a really robust assembly. There is some faffing about to figure out the install to suit your bench, but once that is done it’s a reliable, maintenance-free option.
When I started this blog I talked about selling most of my machines and dragging the workbench into the middle of the floor. Aside from being what I did actually do, I meant it in a metaphorical way too. Clearing the decks and opening up the space for a new way of working. What I’ve since found is that having free access to all four sides of the bench is a real advantage from a practical point of view. It makes it much more useful. For many years it was pushed up against the wall, with the table saw in the centre of the room. Now I work on all sides of the bench. The machinists vice mounted at 45 degrees on the back corner is a recent change and only possible with the space around it. It works really well for chairmaking operations and doesn’t seem to take up any benchtop space that I miss.
I’ve made a wide variety of projects on this bench, from tiny boxes to some pretty massive windows and doors and it worked well for all of them. Often as you use workshop appliances, in time you think of improvements that would be beneficial. I can honestly say I’ve never come across a single thing I would change about this bench. Mind you I did spend about 5 years designing it in my head beforehand. We’ve had 8 happy years working together and I hope never to make another bench, at least for myself in any case. As I’ve said before, I’ll be buried with this bench surrounded by Lie-Nielsen planes, like a modern day Viking. Who likes woodwork. And doesn’t think his family should be sacrificed and buried with him. Actually I prefer the idea of cremation over burial, so maybe a funeral pyre with me lying on the lower shelf, surrounded by random offcuts of wood, shavings and all the things I’ve dropped over the years. That would probably burn nicely.
Really like your post . I am still in the choice of design . It will probably be a Moravian …because I like the style :) and mostly it will be one that might come with me sometimes .
Cheers !
Yes Ed, Lie Nielsen hand planes are quite wonderful both aesthetically and functionally, and I do enjoy using the ones I own. I am curious to know which ones of your LN planes are your favorites.
Cheers,
Michael