

The Seat of Power

You could say saddling a chair seat is just a case of carving it into the shape of an arse. As it’s coronation time here in the UK, I did briefly consider the face of Charles III as a suitable form, but decided I didn’t want to immortalise that particular arse in my furniture. Better to take an understated approach that people would be pleased to see, and indeed sit on. Maybe some people want to sit on the Kings face, I don’t know.
As I discussed of my workshop stool in the Anthology of chair-like objects here, most people’s early saddling attempts take things too literally. Although I said above we’re aiming for the shape of an arse, that was just to score a cheap laugh, what we really need is something more minimal than you think. This is definitely a situation where less is more (comfortable). The pommel needs to be more modest than you think, enough so the seat has some relief and form, but not so much as to make you feel you’ve been on the receiving end of an inappropriate sexual advance when you sit down. Man, those royal connections just keep coming don’t they. The saddling can be relatively shallow, which is good news for those of us working in Oak, as there’s less material to remove.
There’s a progression of tools used in reaching the final shape, which I’ll discuss in turn. To be clear though, you could do this with just a gouge if that’s what you have, as I did on my first stool. All the tools make it easier and quicker, but it’s still possible with minimal kit. Since most of the tools I show will be used for nothing other than saddling seats, it’s understandable that you would only invest in them if chairmaking is a long term plan for you. You will see no Random Orbital Sander in this list of tools. I am keen to avoid the dust to protect my asthmatic lungs and also to do the operation wholly under human power for the first time.
I experimented with using an adze for the initial material removal on this chair, which is a first for me. I bought the adze some years ago with this in mind, but up to that point had only used it to carve a greenwood bowl, which split like a royal marriage, and ended up in the firewood pile. I found the adze a good way of removing the bulk material rapidly. It’s downside is precision, which is no doubt a function of experience. I felt I had to stay well away from any lines, as even with two hands there is risk of a mis-directed swing striking somewhere you didn’t want. I had one right on my spindle deck line that just avoided disaster, but more by good fortune than planning.
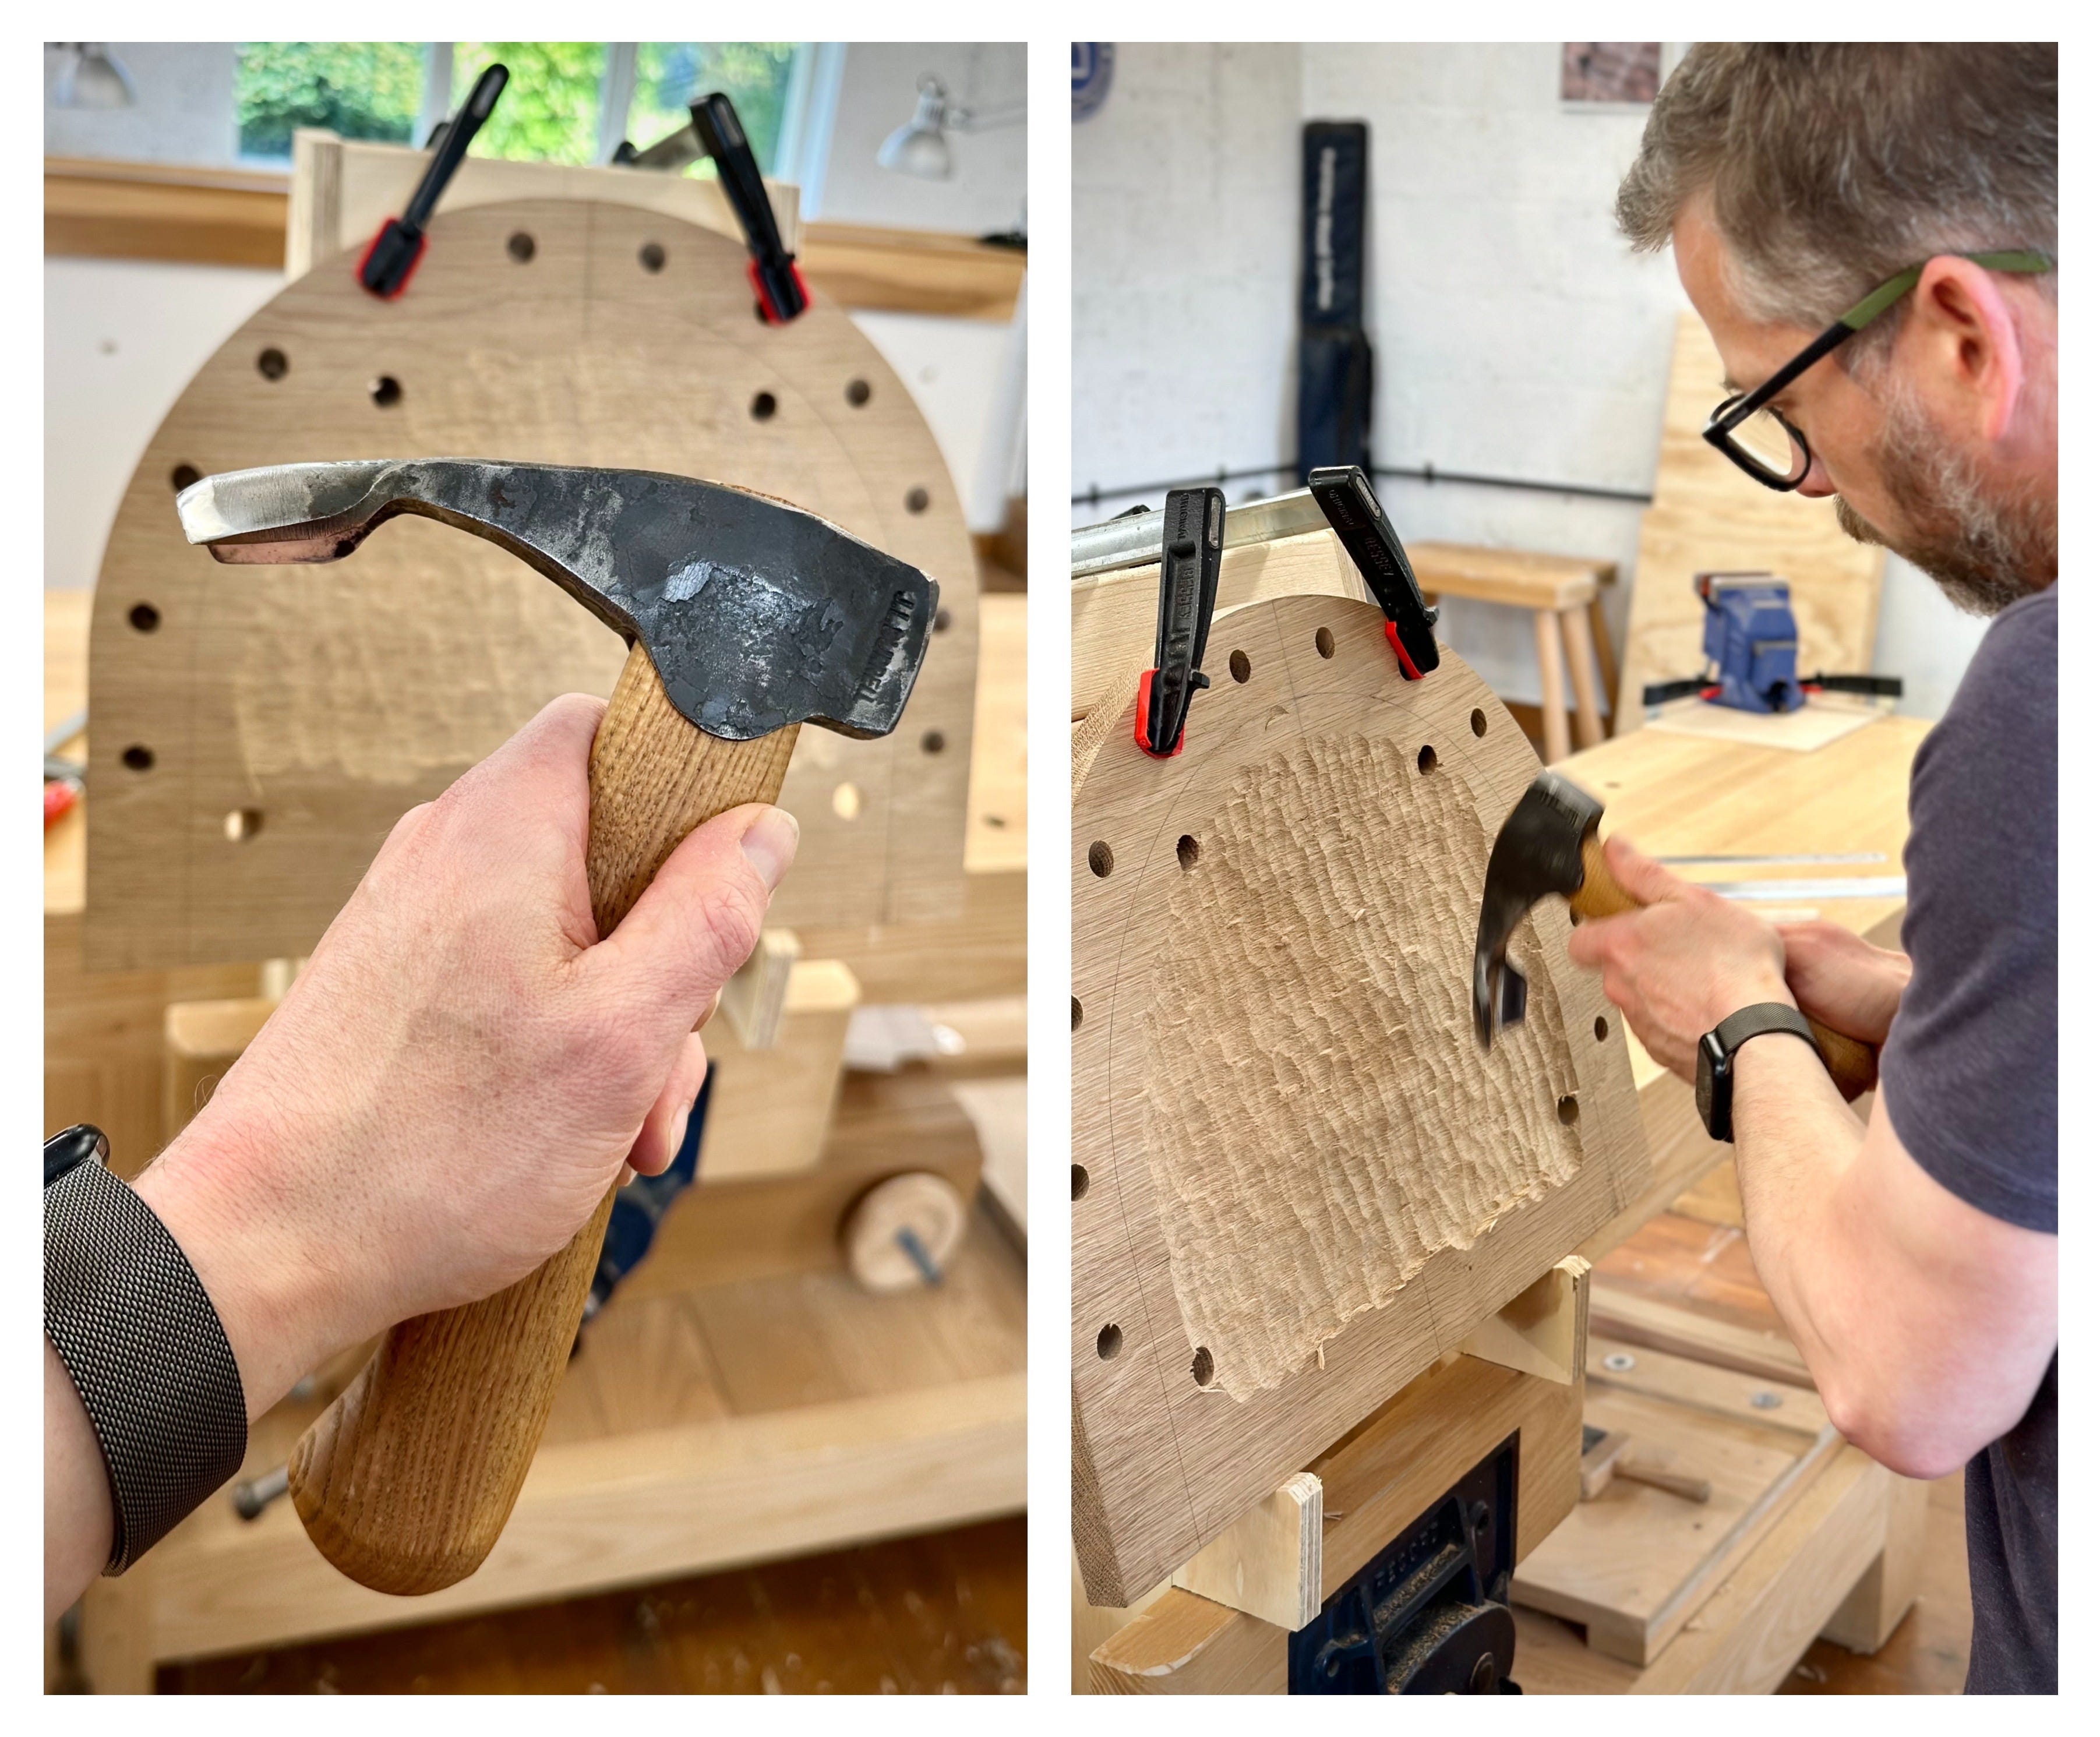
The fixture I made to hold the seat is just a simple plywood rack that leans back at 15 degrees and provides somewhere to clamp the seat at the top. I designed it to be held in the face vice, so the mass of the whole bench is working as ballast. The leg on the rack is stepped, such that the downward force is going directly into the benchtop, with the vice just holding it in position. Swinging the adze and making chips fly is satisfying, although I’m still picking bits of oak out of my pockets days later. A wise man (Mr. C Schwarz) once said of saddling seats that you should have at it like a beaver on crack, and I’ve kept true to those watchwords ever since. It’s poor advice for life in general, but for seat saddling you won’t go far wrong.
After removing the bulk I moved onto the scorp, which has actually been my starting tool on all previous seats. It’s a tool I feel very familiar with and so I worked fairly close to my spindle deck lines to define the seat shape. By this point I’ve marked the pommel out and also the profile on the front of the seat, so I have something to aim for. The first few swipes help you read the grain and once understood, you can skew the tool to get a mostly tear out free finish. The best approach to dealing with tear out is to never create it in the first place if you can help it. Making diagonal cuts across the grain generally does the trick. From time to time I span a straightedge across the spindle deck at each side and check my depth with a rule. In this instance I was aiming for 7/16”.
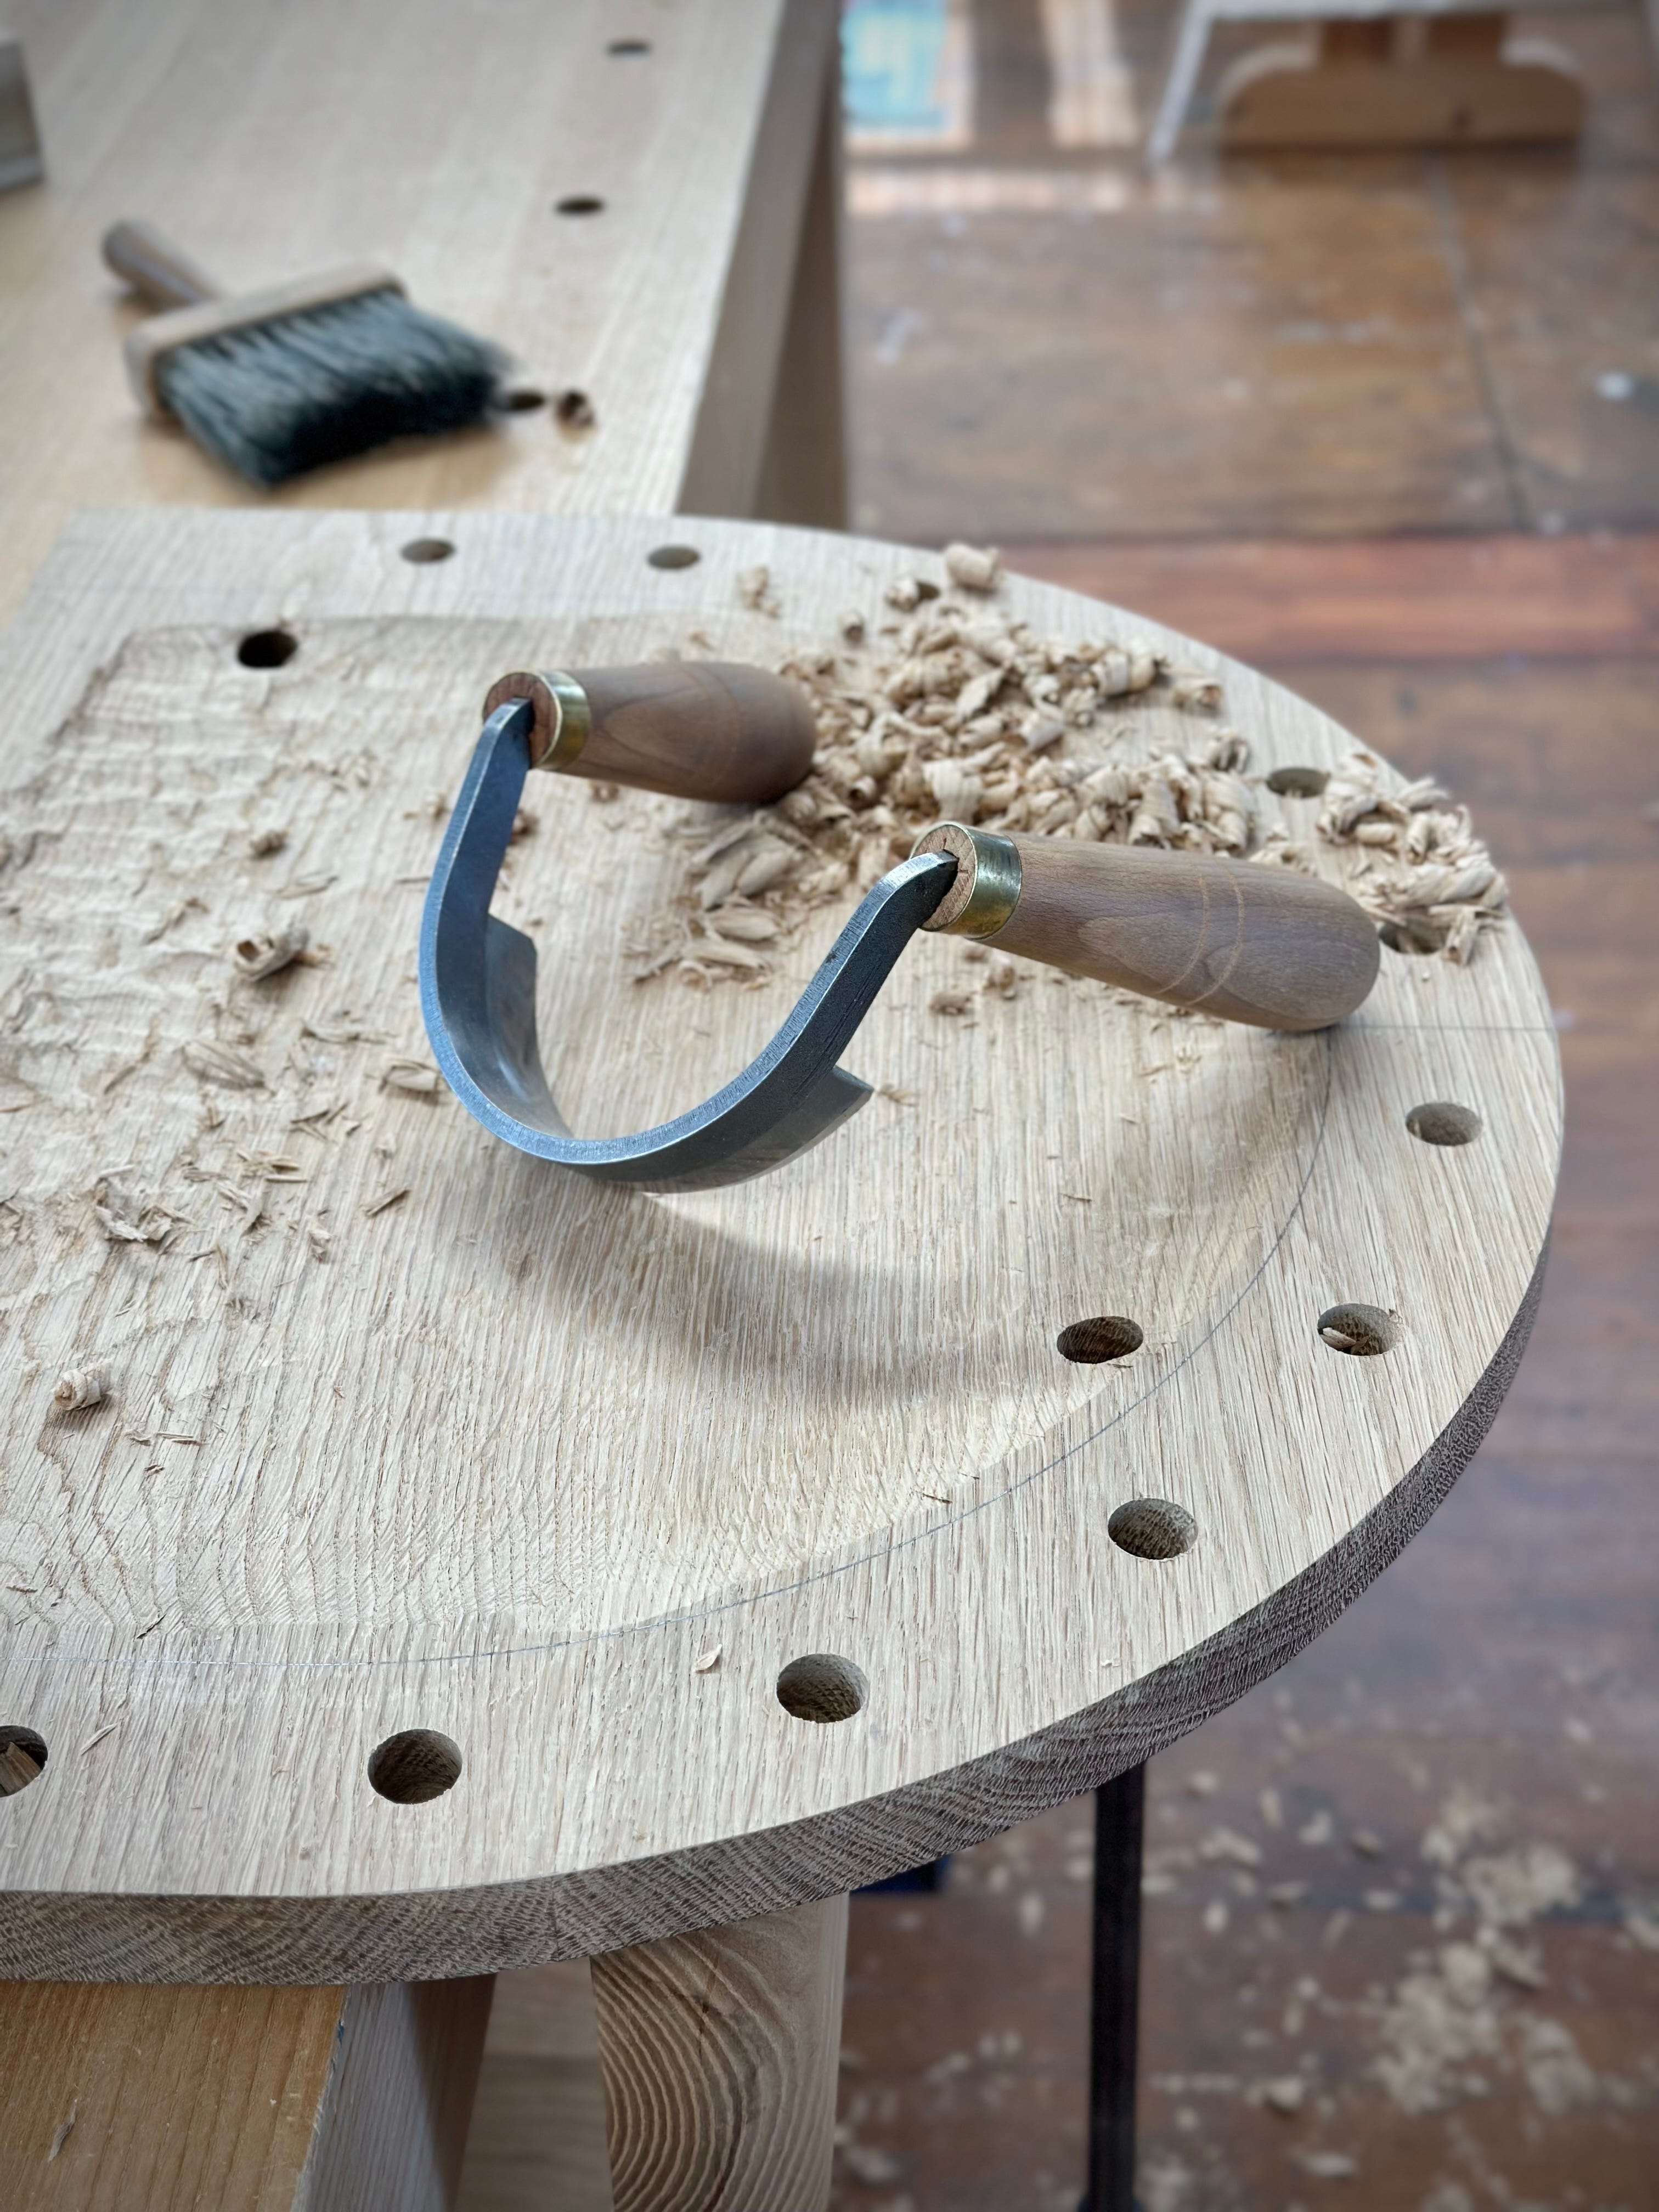
As you can see above, the surface finish is really quite refined even at this stage. Initially I’m working at the rear of the seat, dealing with the back curve, the front part of the seat facing towards me. In the picture I’ve just turned it round so I could work the front part of the seat, pulling into the centre to avoid any break out on that front edge. It’s best to stay away from the pommel at this stage, as that can be refined with the travisher.

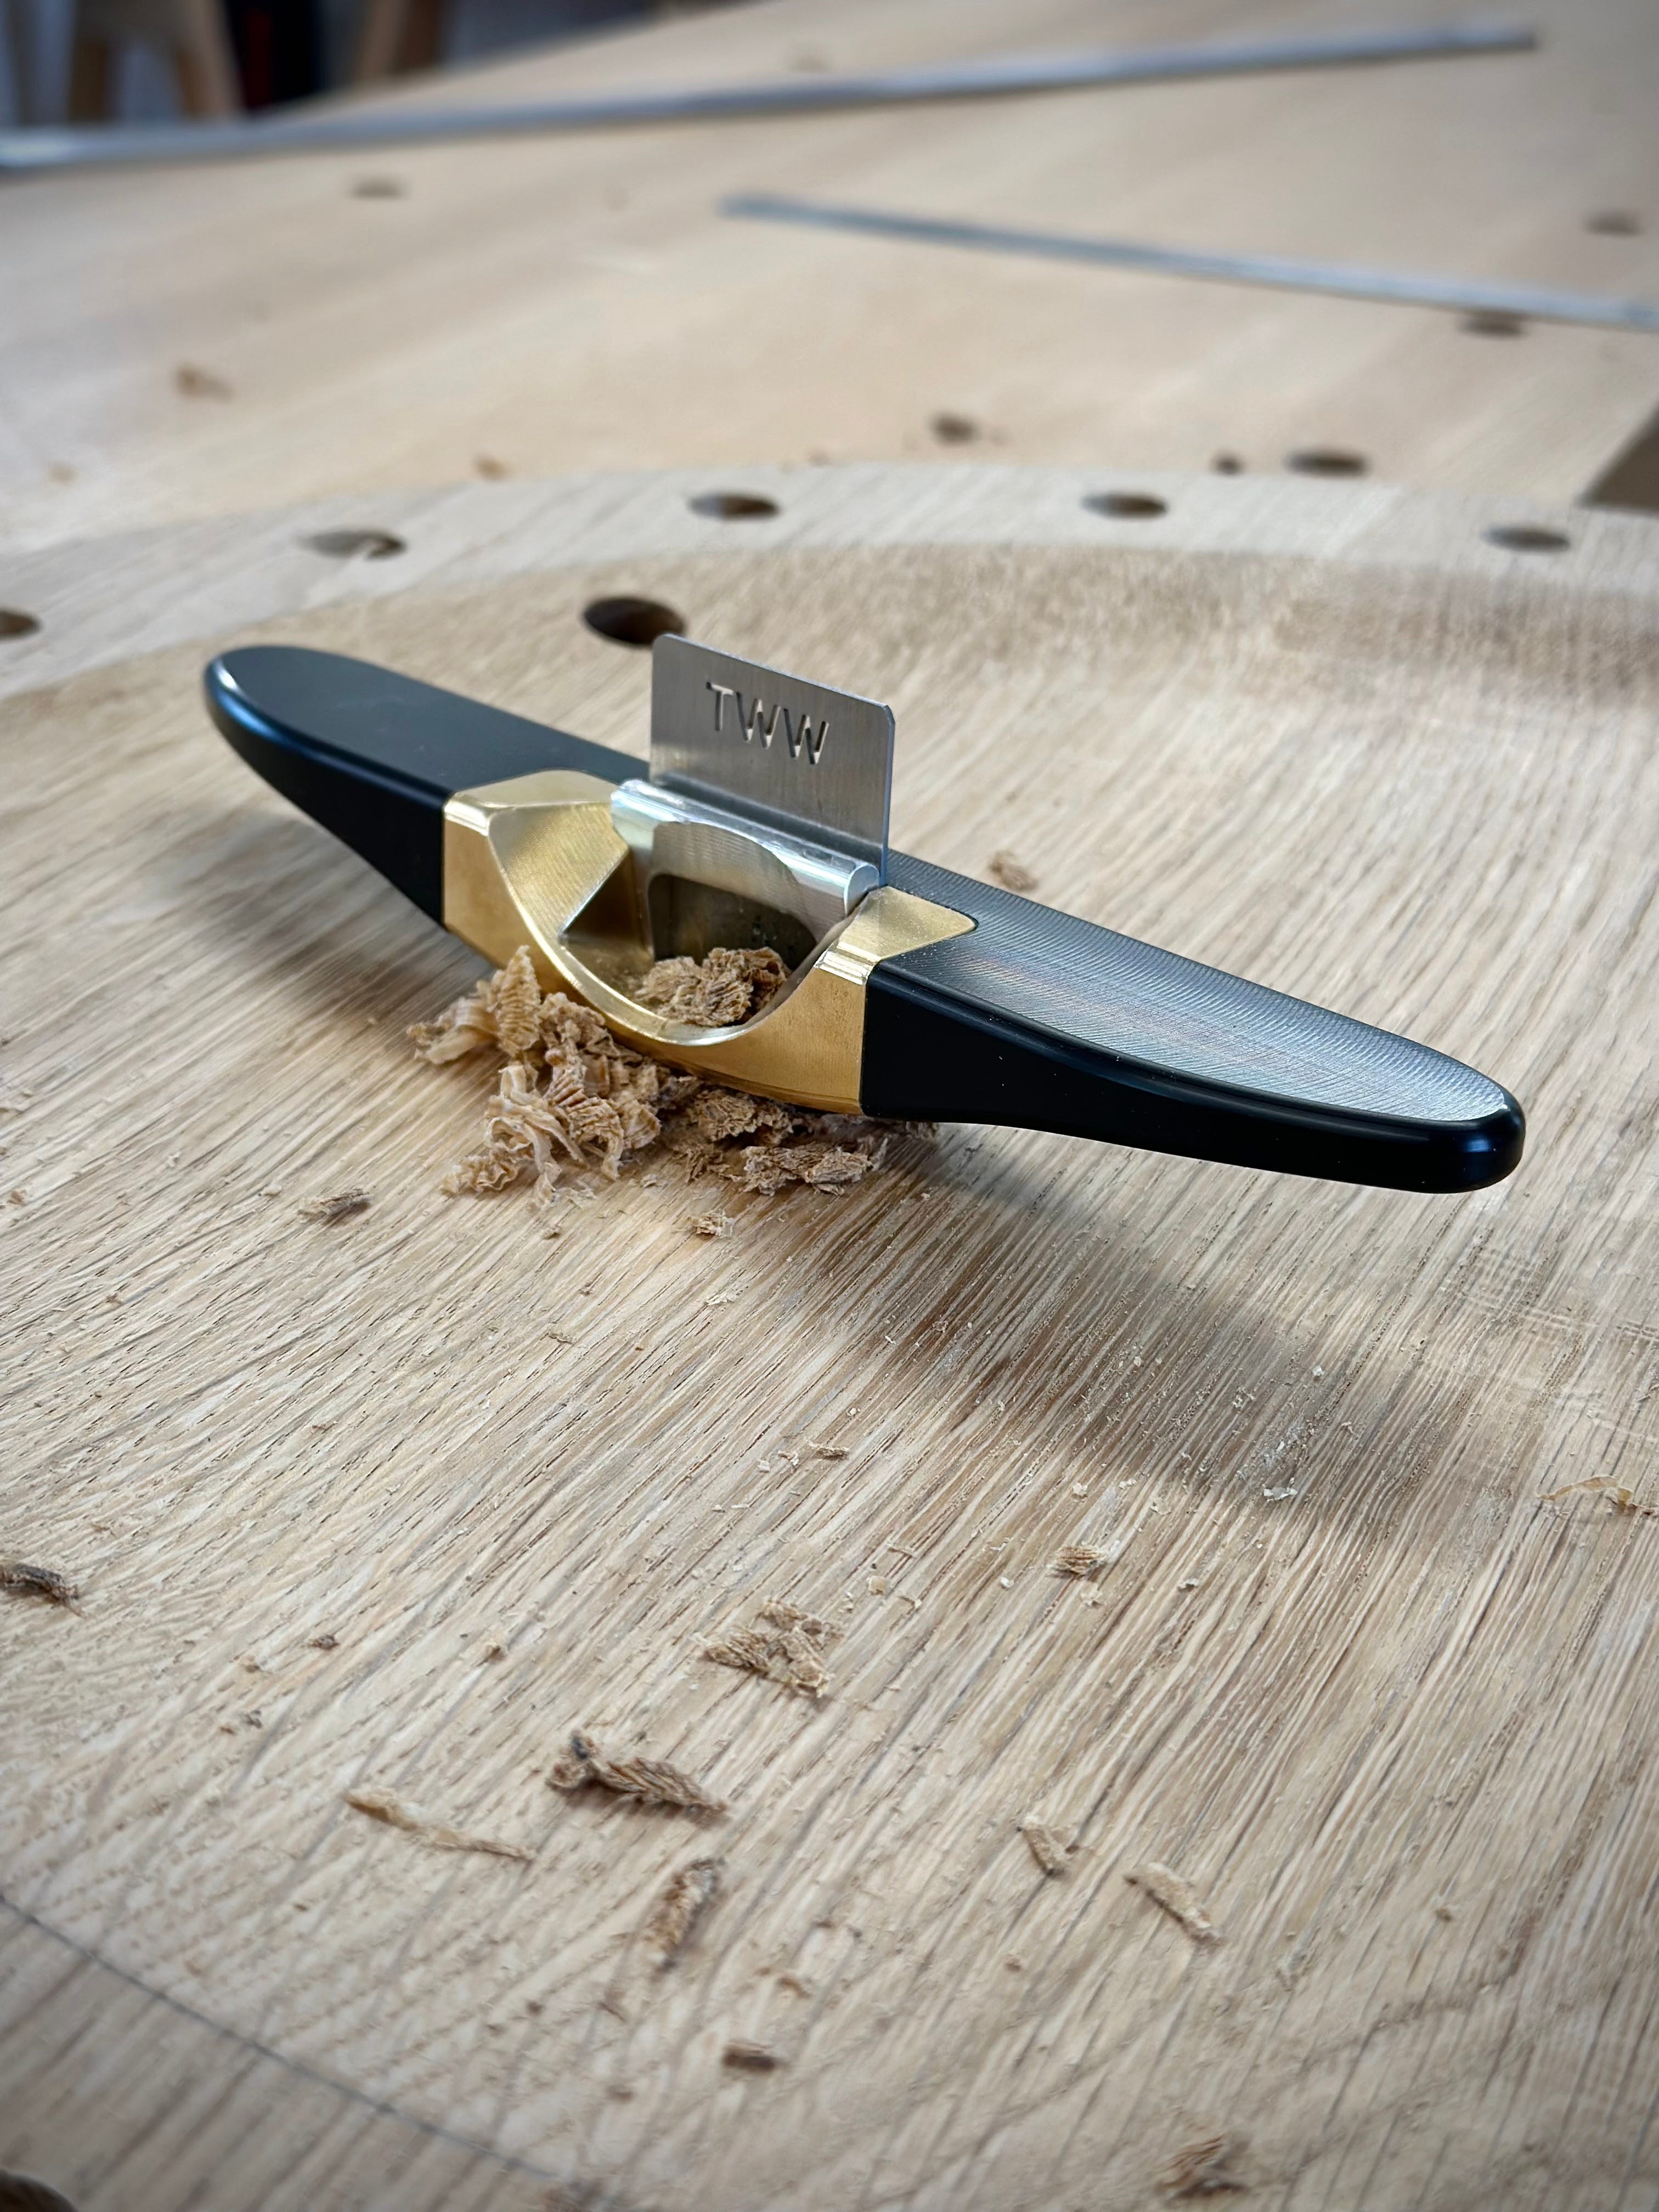
The travisher takes the seat to it’s final form. This is a precise tool so we can work right up to the spindle deck lines and define the finished shape of the pommel. The pommel is 5/8” long at it’s straight part, diving down to meet the seat from there. I’m still working mostly across the grain, with occasional areas justifying working with the grain. By the time I’ve finished with the travisher there is very little tear out. The middle of the seat generally seems to be the danger area for this. I use the travisher to remove any undulations left from the adze and scorp stages so there’s a nice flat finish.
As you can see in the pictures, I’ve chosen not to have a step at the edge of the spindle deck. There is a defined line so you can see the transition, but no change in level. This is for two reasons - firstly I didn’t want to introduce the routing operation needed to form a step and secondly I mostly prefer the appearance of a level transition. It probably takes more time as you have to work carefully on the line, but I like it. There’s some skill involved in creating a nice curve and also care needed in ensuring the defined transition doesn’t get lost in later stages.
The Traviscraper is a step you could easily skip. It’s a nice tool to work quite precisely in refining the shape and dealing with any areas of tear out. But much like a royal family, you don’t really need one and it’s an additional cost that might be unwelcome.
If you were power sanding this would be the point to do that. But I’m not, so scraping with a card scraper is the next step in finishing the seat.

As well as the Crucible scraper I need to shout out the Accu-Burr carbide burnisher here. This is a new tool which greatly simplifies the process of turning the burr on the edge. It has various grooves that turn the burr on both sides at the same time, meaning all you do is keep it level. I never really had an issue with turning burrs before, but the sharpness I achieved with it is better than I’d got in the past. You can see the quality of the shavings in the picture.
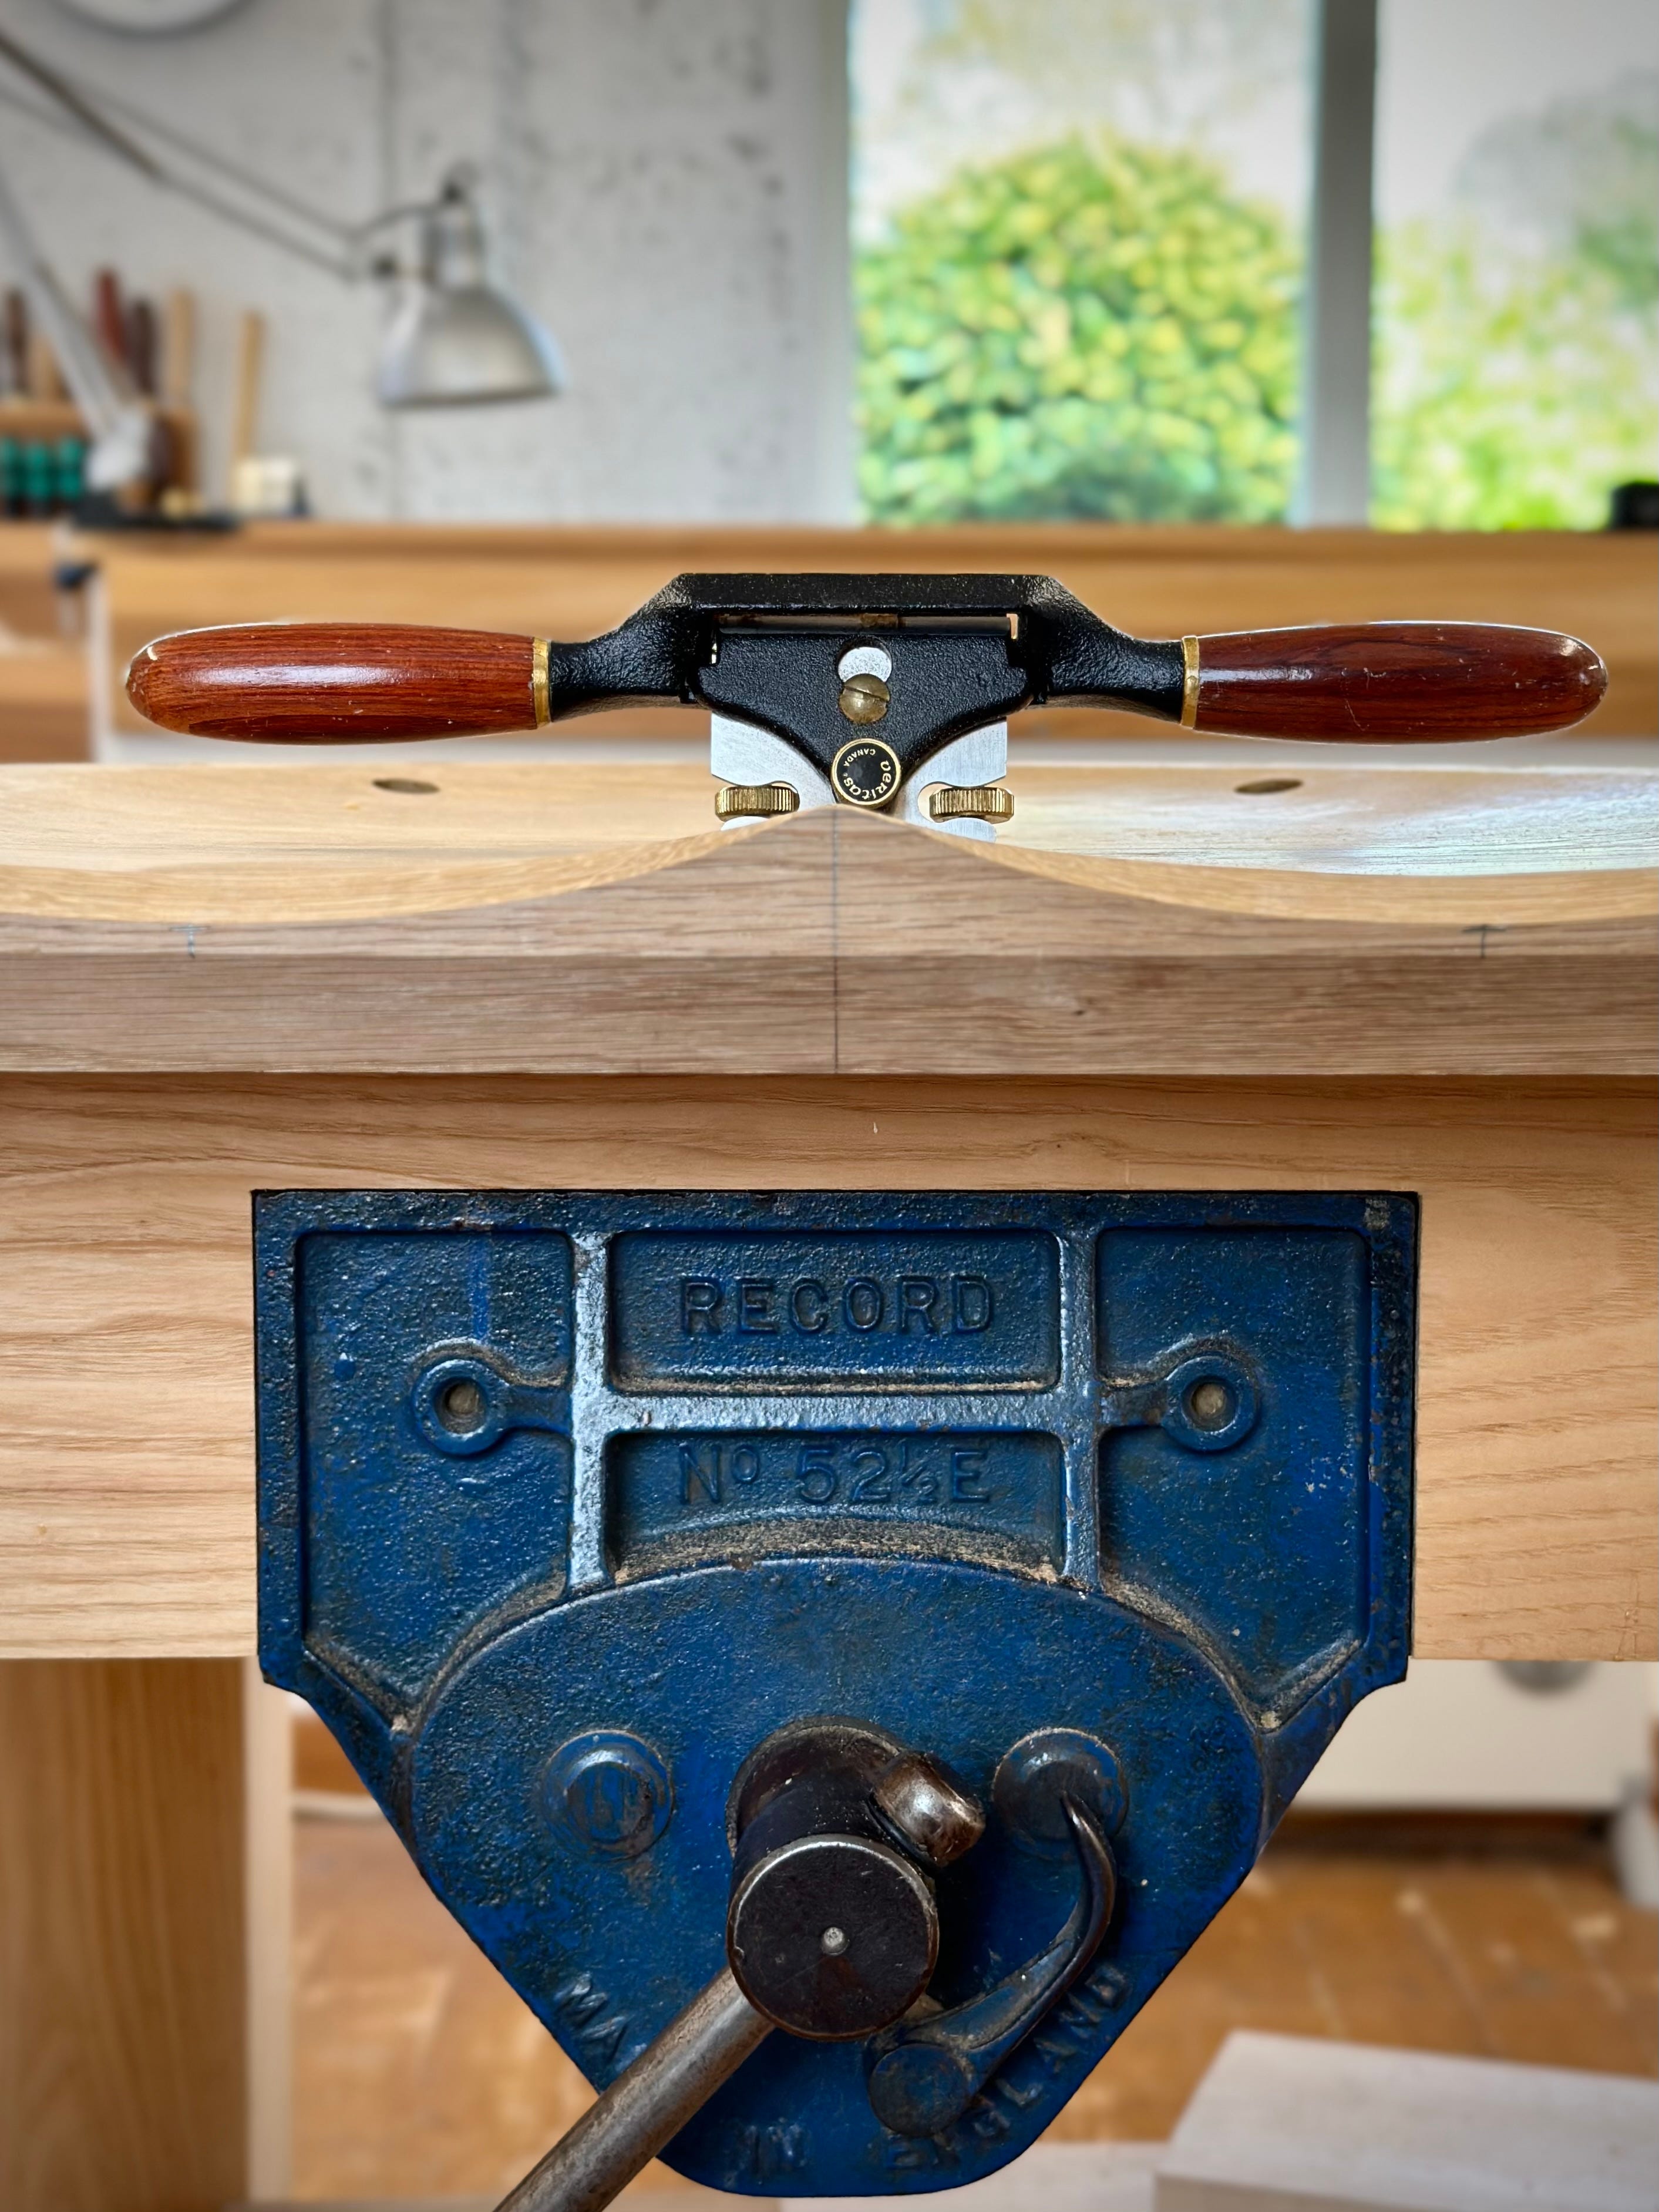
The final step is to carve the leg scoops, which give both comfort and some drama to the front edge of the seat. Working with a spokeshave allows these to stay really crisp, with a nicely defined line. You need to work downhill here, so the cuts go in from either side, meeting in the middle. The leg scoops are 3/4” deep at their greatest.
Sorry if this post has gone on far longer than anyone wanted it to and probably ended up costing you more money in the long run. Yes, just like the monarchy.
Love your writing, and the information is awesome. If you ever want to make it paid subscription, count me in
Nice to get your practical take on the process! Being in the early stages of chair-making, you’ve reinforced the value of persisting with the hand tools, not bothering with an extensive armoury and taking your time. The royal asides were entertaining also 😄😄